Image Map
Showing posts with label Craft. Show all posts

Wednesday, 27 November 2013

Christmas at Doddington Hall


doddington1

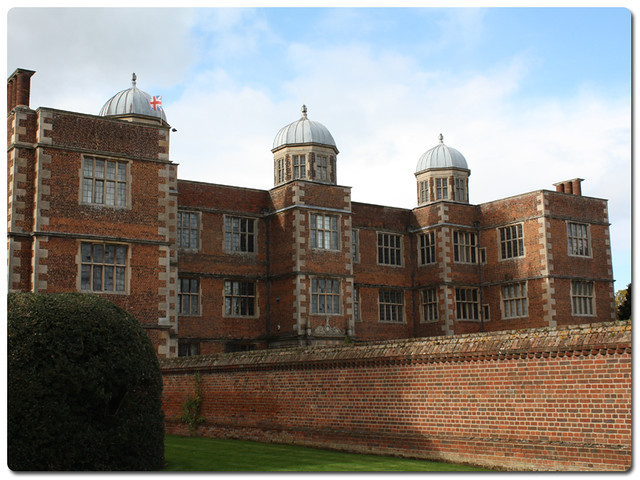
A couple of weeks ago my mother and I popped along to Doddington Hall, the stately home just outside Lincoln to visit their christmas craft fair. We have been told to visit the hall so many times by friends as they know we would enjoy it, but we had never ventured further than the farm shop. The Christmas craft fair was the perfect excuse to spend a few hours there admiring the wares of the stall holders and visiting Doddington's own shops.
doddington2

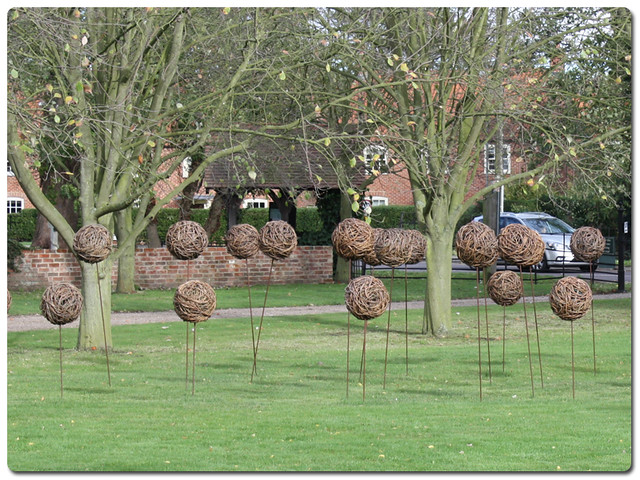
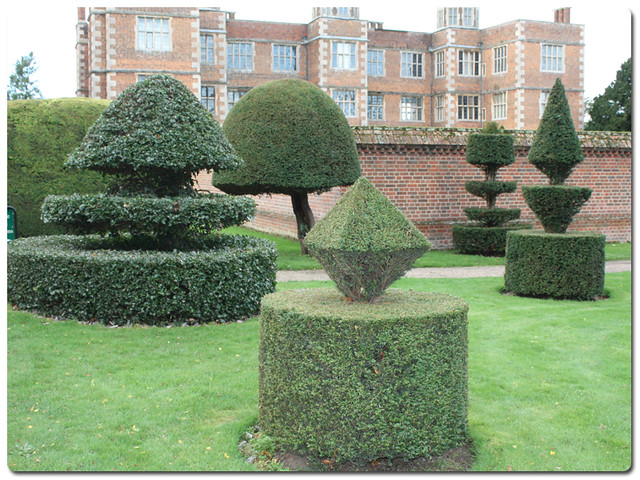
The house itself is a family residence so isn't always open to visitors but the grounds we did take a peek at were beautiful. These garden sculptures made me chuckle, but they are very in keeping with the aesthetic of the Hall which seems to be homemade country estate wares, with local produce and good quality homewares and clothing.
doddington3

The stall holders were selling some beautiful items.
doddington4

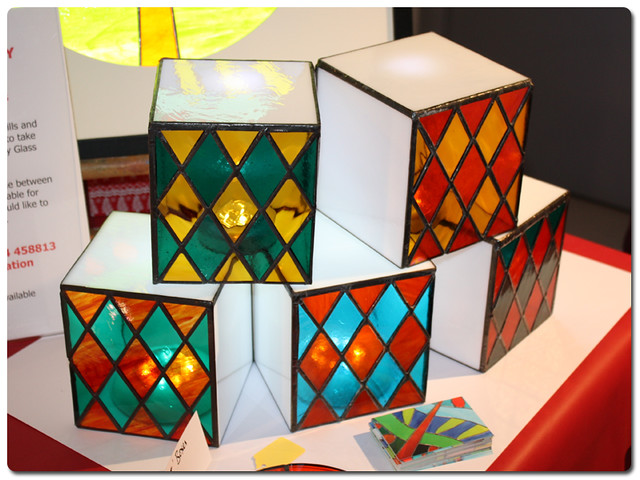
Strawberry Glass Stained Glass pieces and workshops
doddington5
doddington6

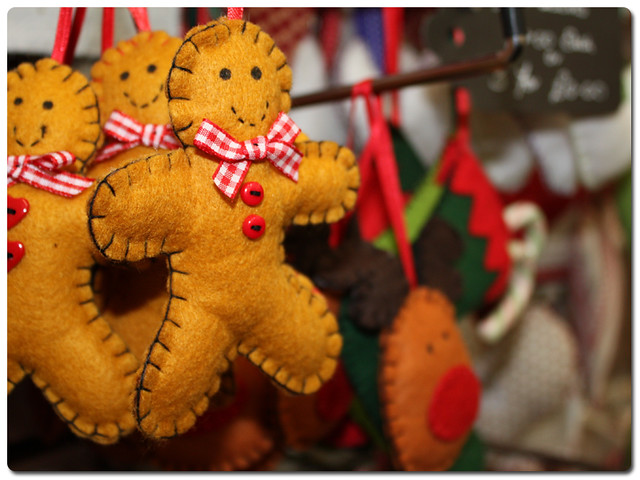
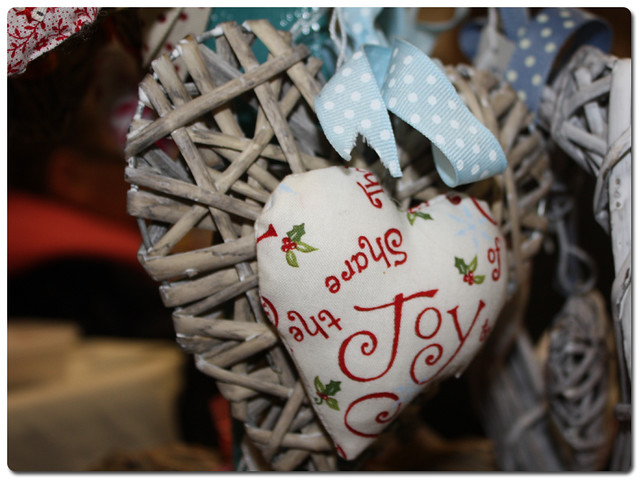
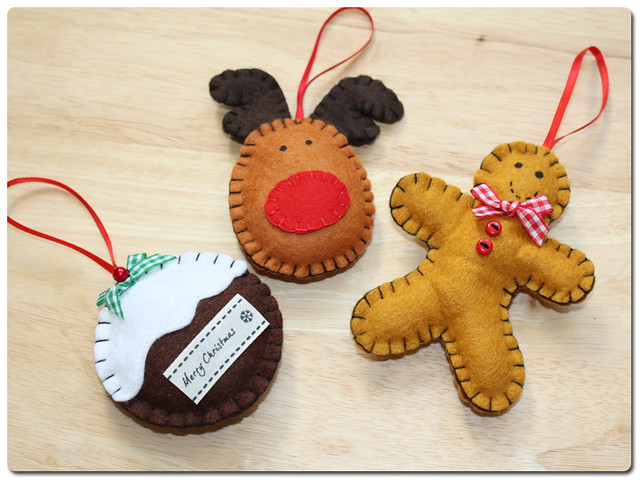
Cute felt tree decorations and bits and bobs from Heart Felt & Homely
doddington7

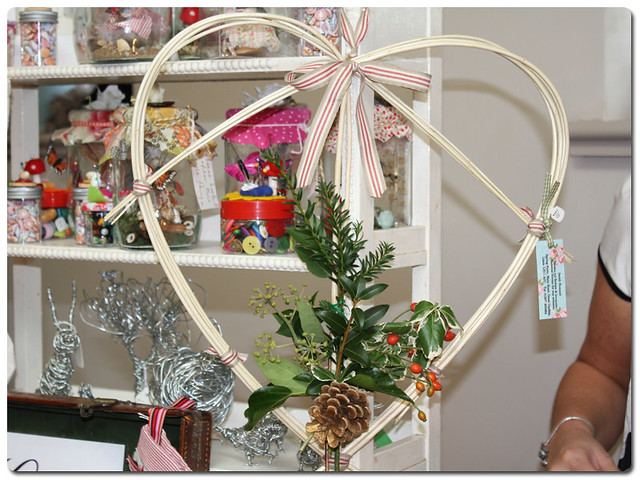
These willow heart wreaths by Sarah Hommel were so pretty and customisable, I wish she had a website, but I have her card for if we decide to get one this year.
doddington8

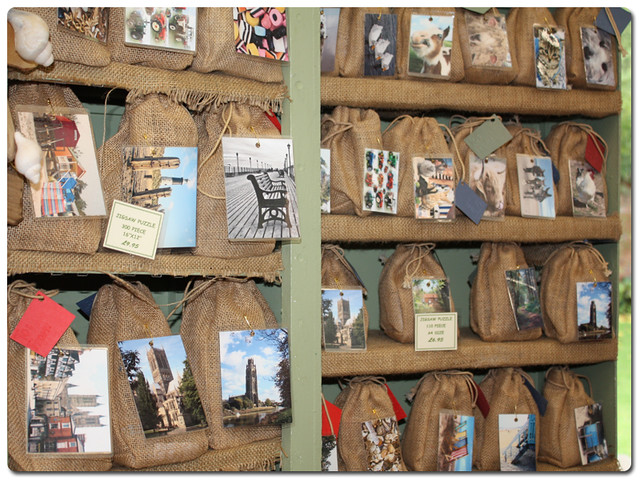
I thought these Jig-Sak's were a great idea, especially for christmas presents for grandparents and we may have to place an order.
doddington9

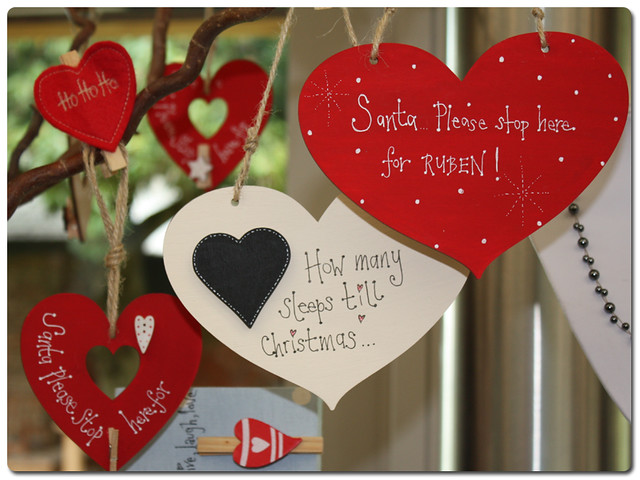
Buttercup Lane personalised all manner of little signs there and then for you, both christmas themed and not.
doddington10

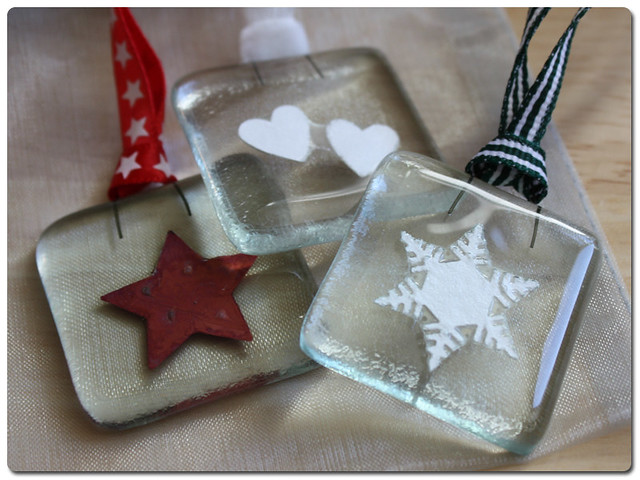
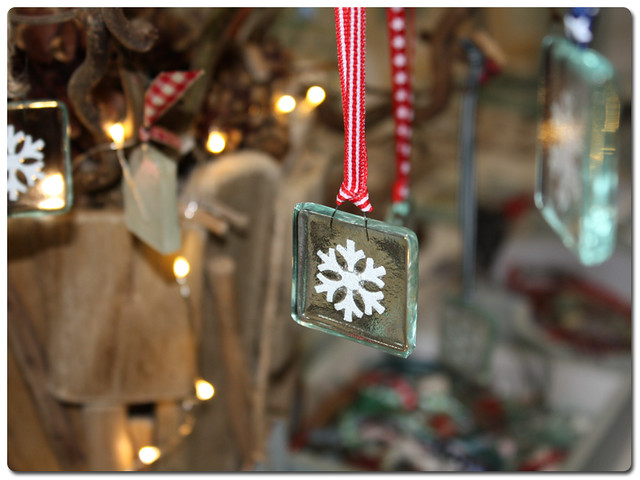
These beautiful tree decorations are made from fused glass, Donna Evans had these along with other fused glass items for sale, including some lovely jewellery.
doddington11

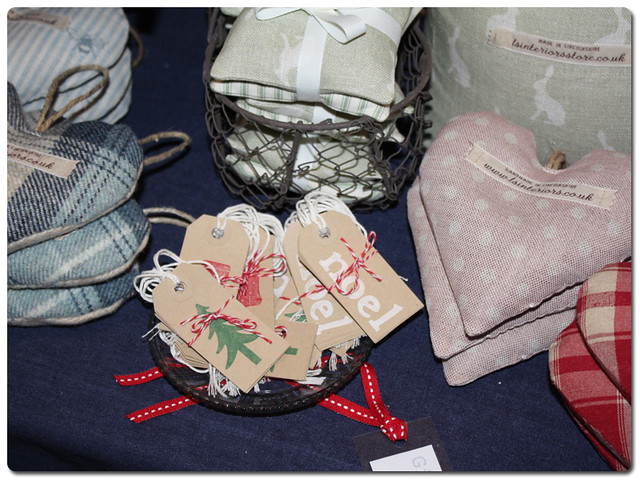
L & S Interiors had some very nice fabric items, I was particularly taken with the door stops but until we have a house with doors to stop I refrained from buying one and instead admired the little items.

doddington12

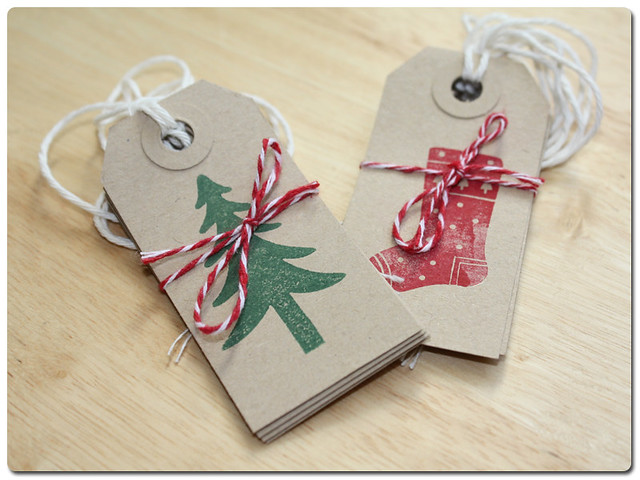
After browsing the items available we picked up a few for ourselves. I went for tree decorations mainly, because I love quirky ones and these were all so lovely, but I also picked up some hand stamped present tags too. My mum also had a "Santa stop here" sign personalised for my cousins, it is so cute and I think personalised presents are always a little bit special.
doddington15
doddington16
doddington17

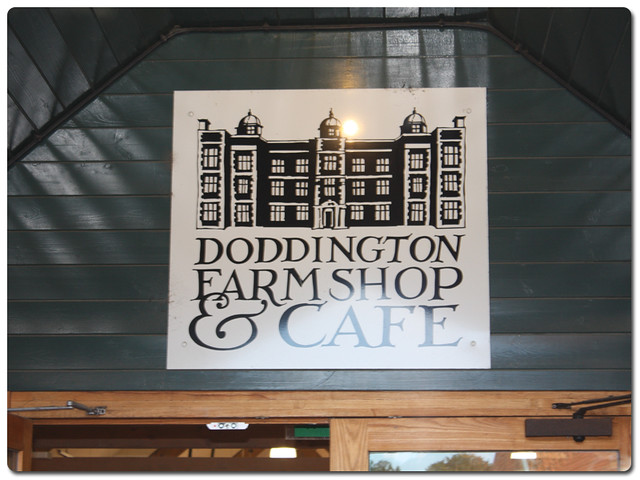
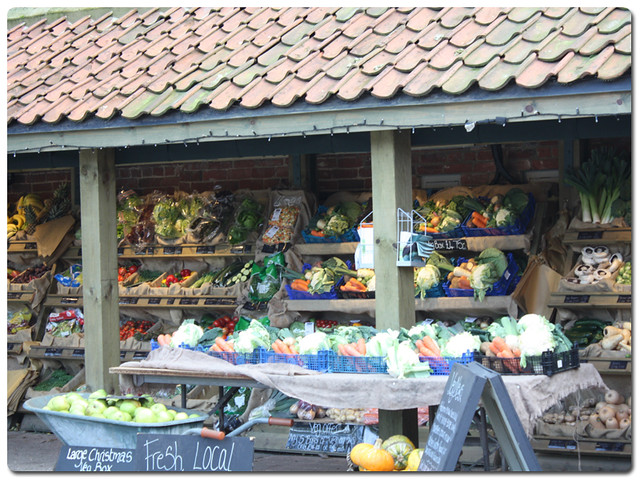
After making our purchases we wandered into Doddington's own stores. Our first stop is nearly always the Farm Shop!
doddington13
doddington14

After admiring the lovely grub and picking up some speciality items (local drinks, biscuits and a few bits of veg) we popped into the famous Bauble Barn, which unfortunately was far too crowded to start snapping pictures. This is basically a grotto filled with a wonderful array of christmas decorations at a range of prices, I was really very tempted by some Gisela Graham ones but was restrained as we don't yet have a big tree to be filling with decorations.

Finally we stopped in at the India Jane interiors store and the Doddington country clothing store. India Jane was full of lovely items, though all quite expensive, and again I felt not really the sort of place I could pull out my camera, but there were some really beautiful pieces that would add an elegant touch to any home. The next time we need to buy picture frames we know where to go! They had some lovely ones which would make perfect gift items.

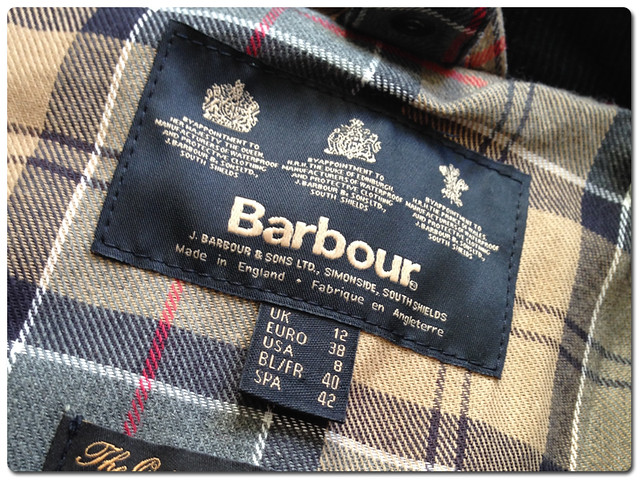
The country clothing store stocks a range of brands, Musto, Barbour and the like, and I may just have purchased something I have had my eye on for a while.
doddington18

Oops!

Monday, 21 June 2010

Sunshine and Rainbows.


The weather outside today is beautiful!

So I have a few new things to show you today, the first is obviously the website, do you like it?
I actually gave up on what has been a few months of trying to find a theme on the internet that I liked and just went ahead and drew my own and then scanned it in. I wanted something clean and slightly traditional which is kind of what I am all about, so I used my own handwriting (which I have been told looks like a Grandmother's) and drew a little needle and got my ink pen out to make a splat. I really like it, I think it suits a lot better then any of the other things I have found.
I also discovered the advent of the 'Pages' feature on blogspot, and have written a little about me, have an archive page, and a contact form for if you need to shoot me an email. I imagine I shall add a page specifically for images to do with my shop when I get that up and running too!

In regards to pointy sticks this fine Monday, I am knitting the heel flap on my second Hermione sock, I had set myself the challenge of finishing the sock this weekend, but I got some crazy rash thing on my hands from the heat and I have like hives all over my fingers so it hurt too much to knit and I had to stop, but I hope to have it finished and nicely modeled soon.


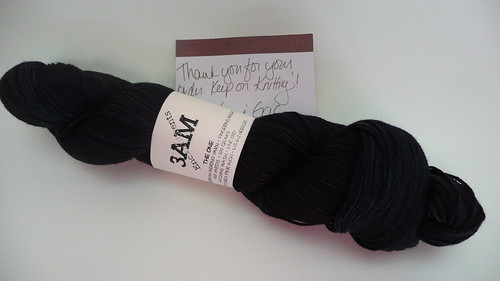
A couple of weeks ago I got this great yarn from 3AM enchantments, which I briefly mentioned in my last post, and I have a picture of it, though it isn't a great one, the yarn is black but with subtle waves of green and blue when you hold it in the light. It is lovely and soft and I can't wait to knit it up into a shawl. I got this at half price because the effect is technically a mistake, the yarn was over-dyed, I however really like it! I shall take a picture when I am knitting it up to hopefully get a better idea of the colour.

One of the other things I got the other week is these two books:

They are great! The Ultimate Sewing Bible, to match my knitting one is my ultimate go-to when I am not sure how to do something. Printing by hand has been very handy lately with tips on fabric printing and the different methods you can use. It has been invaluable over the past week while I have been printing.

Speaking of printing, I have some sample images for two more prints from my 'Wonderland' collection.
First we have the White Rabbit,

Second we have Alice.
These are joining the Drink Me cut from my last post and then I have two more prints to cut, The Hatter and Painting The Roses Red. I am hoping to have them cut and have some fabric printed for those by the end of the week, and then hopefully I will have some bags all made up and ready to go! I am also looking at making other things, such as a knitting file with space to put info about all your projects and things, but I think before I branch out into stationary I will be starting on my 'Little red' collection, featuring, of course, Little Red Riding Hood! I can't say enough how much I am enjoying all this, it feels so great to be being so productive and really using my hands to make things in a way that I haven't done in years.

Sunday, 13 June 2010

Buzz Buzz Buzz


I have been a very busy bee!
First I have a knitting update and then I have some printing progress to delight you all with.

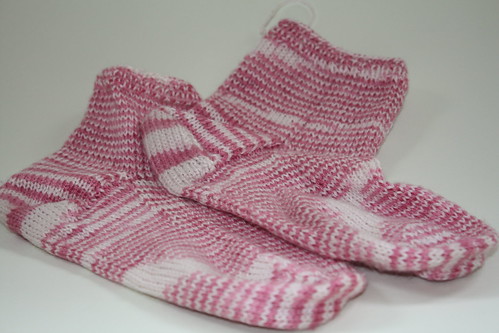
First things first, because they are first, I have finally finished my Berry Socks!! *Screaming applause* It took me long enough. I started these way back in October of last year and after a while I simply stopped knitting on them, but I ploughed through and finally finished them about 2 weeks ago and have been wearing them as sleeping socks.
I am really picky about my socks not having a cuff that comes too far up the leg (I have very large calves from walking everywhere and they always seem to be too tight) so I made these with a shorter 30 row cuff as opposed to the 60-odd rows it was supposed to be. One good thing about doing this is that I always seem to have some wool left over! I actually have nearly half the skein left on these so I could knit up some more with a smaller needle size for some tighter socks.


So FO report:
Pattern Name: Regia Bamboo Sock Knit Kit/Made up in my own head.
Yarn Used: Yarn Addict Yarns Angel Sock Yarn - 0.51 of a skein
Needle Size: 3mm DPN's and Circular using magic loop
Problems: I turned the second heel slightly differently then the first because I couldn't remember which way I had done the first one!
Modifications: I CO 60 sts, Knit 1 row to join, knit a K1P1 rib for 5 rows and then knit in sockinette for 27 rows, the heel hight is 25 rows, with slipped stitches at the ends. The numbers for most of this came out of my own head, not following the pattern.
Skills Learnt: My first sock and my first turned heel!
Knit again: Probably not in the same size.
Score: 6/10

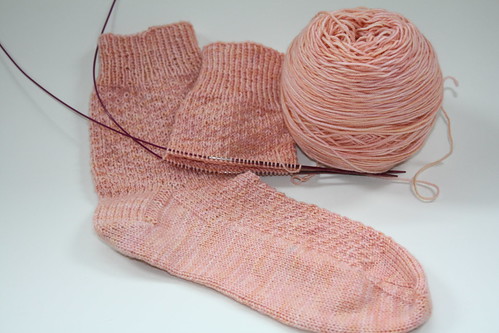
Next up I have an update on my Hermione Everyday Socks, I am about 4 pattern repeats from knitting the heel flap on these (I am only doing 12 repeats, not 18), I will possibly sit and do that later while catching up on some Supernatural that I have on DVD, knitting and Dean Winchester, the perfect night's entertainment!


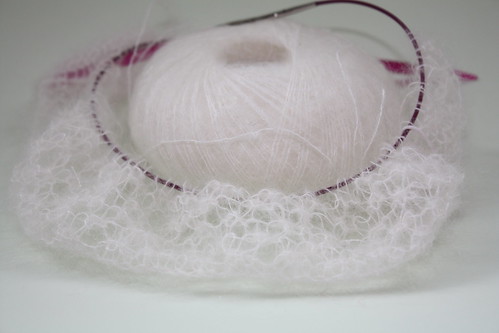
And I just have one more knitting project to show you, when I completed the Berry Socks I felt I should have another project on the needles so I started this lovely Anisette Shawl.

I am using Kidsilk Haze in Cream for this one, and I am making it to the wrap size dimensions instead of the scarf. this is strictly for when I want to concentrate though what with the yarn being so thin and the wrong sides not just being straight purl I have to actually think about what I am doing.
I love the yarn though (I knew I would) It's like knitting a cloud.


On the printing for the shop front I have been creating lino cuts along certain themes lately, the first being Alice in Wonderland.
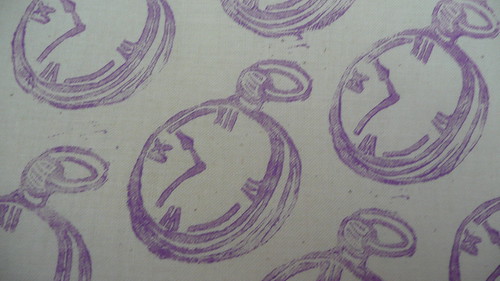
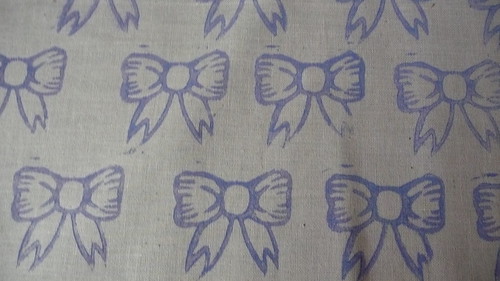
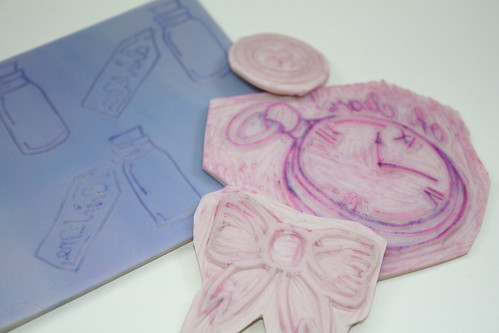
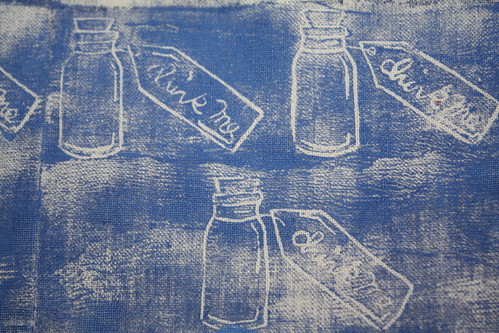
I have made a bow which will be blue, some 'Drink Me' bottles and the White Rabbit's Pocket watch. I spent some time last night printing the drink me bottles and I do have to perfect how much ink I need on the lino before I stamp it, and I have found that a heavy candle works better as a roller then my rolling pin!
I am going to make myself another project bag with this fabric which is just for me, I also hope to start running some bags off for putting in a shop during this week as I got some cover yourself buttons in the post the other day and I am printing them like this:
Cute huh? Looks like a button, and is a button, I crack myself up!


P.S. I got some great yarn the other week from 3AM Enchantments over here on etsy, The skein is wonderful and I am waiting for some better light so that I can show it to you, but go check them out!


Wednesday, 26 May 2010

Making new friends


As you can see the nice weather broke today and we had a bit of rain, not very nice, but I managed to keep busy, I made a new friend in this little guy.


I have been trying to figure out how I could print my own fabrics for my knitting bags, I really want them to stand out. I had a little go at screen printing on a small scale but I can't seem to find any fabric paints that I could use in my local shops, so today I tried some lino printing with some basic Dylon fabric paint. I am not actually using proper lino at the moment so I will have to test it again when that gets here, but at the moment I like this style. Despite the fact that three of the fiver digits on my left hands have cuts on them.
I think the other option may be stenciling as this would also be cheap and easy to do, all I would need is a craft knife and some acetate, I already have stenciling brushes from my Mum.

Either way it seems I will be embracing my creative side more often. I really don't know why I didn't think of this sort of thing sooner, as a kid I was always crafting and making things, I guess deciding to do English Lit at university makes you think the written work is all you can do. Time to let my mind think visually for a while :)


Saturday, 15 May 2010

Tea? Part IIII


The Grand unveiling!

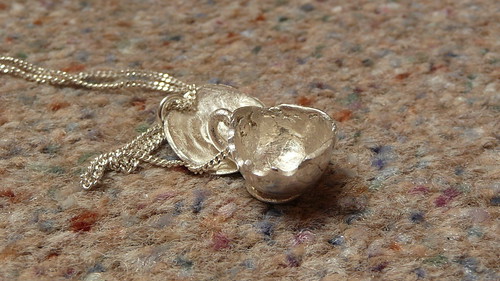
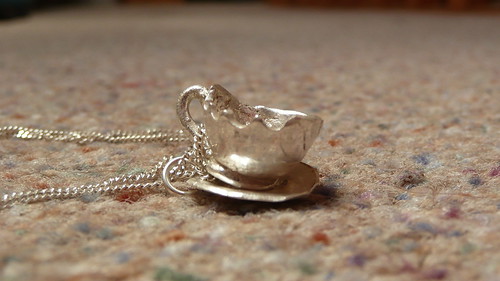
Using the pliers and a jump ring pop a hoop in the hole in the saucer, and then thread it onto a silver chain, then feed the chain through the handle on the tea cup and...


VOILA!!


One thing that you should note is that if an item is over I think 7g, possibly 10g, in the UK it must be hallmarked to be sold as silver. the hallmark for silver clay is 999 as it is 99.9% silver. This can be done with an engraving pen.
I have been wearing this every day and it is my new favorite piece of jewelry, I hope you like it too.

Tea? Part III


Now for the fun bit, firing. This may be fun but it is also dangerous and Is definitely only for people who have had their shot of caffeine!
First I placed my fire grille on the hob (this came in the set I mentioned in Part I) and turned up the heat. You have to wait for it to glow orange before you can begin, and you need to remember where the orange bits were because these are the hottest areas and you are then going to turn off the hob and place your clay items on the hottest parts of the grille using tweezers and turn the heat back on.

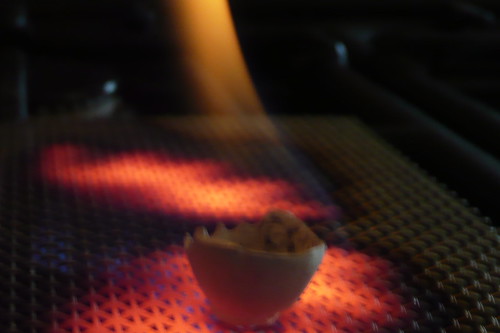
This picture is larger because in my opinion it is the coolest part of the process. After the clay has been heating for a few seconds the binder will burn off in an actual visible flame, much like when you flambe something you are cooking, only on a smaller scale. Obviously I wouldn't recommend standing over the item at this stage or you may lose your eyebrows!
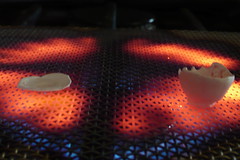
After this stage the silver is starting to fuse together, and so you have to wait until there is a slight orange glow to the items, as you can kind of see below (this is really difficult to photograph by the way!)

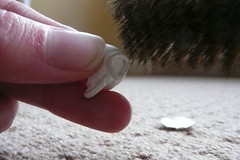
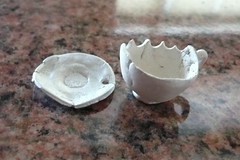
After they are glowing orange you need to keep the heat going for a few minutes to make sure they are properly fired through. You then need to turn off the heat and leave them to cool for around 20 minutes. After tis time you can move them and place them in cold water to completely cool them off. When they are fired they should be a bit smaller and will be covered in a white residue like this:

if you clink them together you can also obviously hear that they are now metal. Now comes the final parts, using a wire brush (I am using a soft brass brush here because I find stainless steel ones are too harsh) you need to brush away all the white residue until the items are a dull silver colour. Then using a silver burnisher you should rub all over the item to make them shine.

The Final post will be the unveiling :D

Tea? Part II


Onwards!

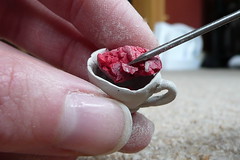
Now the first stage when the clay is dry was to remove the polymer clay from the cup. I used a needle tool to do this because it is nice and sharp. You do need to be very careful when doing this however, gently remove parts of clay at a time, because the silver clay although dry is still fragile and can be crushed easily.

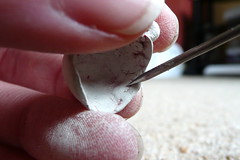
Once that was done I then used the needle tool to pick out any bits of clay that were stuck in the grooves of the clay, this is fiddly but sanding does not always get it all so it is a good idea.


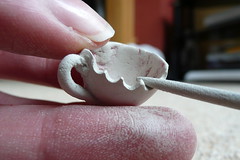
After this I had to file the teeth marks into the side of the cup, I used a round miniature file for this and simply filed marks next to each other but increased the depth of the hole on the center ones, this took a bit of work and made a lot of dust so be careful and put a cloth down.
Also again this stage requires you to be gentle as too much pressure will break the cup.


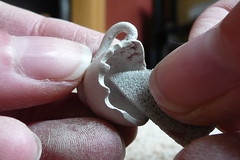
After I filed the teeth marks I also filed the edges of the top of the cup to smooth them down and make them even. I then used a superfine sanding pad to smooth all over, I attempted to remove as much of the uneven texture inside the cup as possible. It is important when doing this to try and keep the sanding stokes going in the same direction as some of the pattern will show through after firing.

After working on the cup I simply sanded the edges of the saucer and made sure there wasn't any excess around the jump ring hole and I was good to go for the next step, Part III: Firing!


Tea? Part I


'Take some more tea,' the March Hare said to Alice, very earnestly.
'I've had nothing yet,' Alice replied in an offended tone, 'so I can't take more.'
'You mean you can't take LESS,' said the Hatter: 'it's very easy to take MORE than nothing.'
- 'Alice's Adventures in Wonderland', Lewis Carroll

That above is one of my favorite quotes, from one of my favorite scenes in all literature. There is something about the ridiculousness of the Hatter and the Hare that appeals to me, it must be my silly side making itself known, and it is the fact that the ridiculousness is in fact very true.

Now because I love the mad tea party so much, for my second silver clay project I decided a tea cup and saucer would be perfect. It is also something which is very me (I have a thing about afternoon tea, for my 16th birthday I wanted a full tea service, nothing else, just a pretty antique tea service, I finally got one when I turned 18) and so is something which I can relate to in a number of ways and any items I would make regarding it would have multiple references for myself. To make the set more 'Mad' however I also decided to bring in the 'eat me, drink me' thing, so there is a bite out of the cup, cool yes?

Now on to the pictures! (Note: My camera died while I was doing this and the clay dried quickly so some images are of the saucer and some are of the cup)

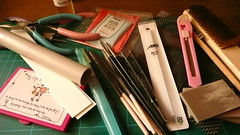
First up, the tools required for using silver clay, now not all of these are necessary for every project, but a lot of them are essentials, in this picture we have craft knives, clay shapers, files, rollers, sanding pads, pliers, burnishers, and wire brushes among a couple of other bits and bobs. I got the basics in a set which was around £30 which I ordered from here, but a lot of other stuff I simply got from my local craft shop and other online retailers, such as basic jewelry findings and jump rings and pliers and things. I am going to be making another ring in the near future and for that you would require a couple of extra things and I will show you those when the time comes.


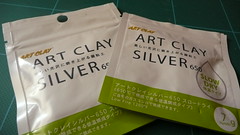
Now, the actual clay. I use Art Clay Silver 650 in the Slow dry version. The slow dry part is very important because I am not very good at managing to quickly do what I want to do to manipulate the clay and so this significantly extends the working time I have. I also have to keep the clay moist with a water pen while I am working. The clay comes in packets like this:

These are 7g packets, and when you open it you may think that there isn't much clay for what you pay (around £8/9) but I made my first ring with less than 7g so it goes a long way. You can buy in 7g, 10g, 20g, and 50g weights and prices are a little over £1 a gram, which I believe is reasonable.

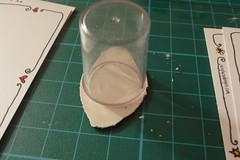
Now on to the making. I have missed a stage in the pictures here because it came out blurry, but the first stage is to grease your hands and tools with vaseline and then roll put the amount of clay you want to use, now you can use special spacers or playing cards (or naughty fairy cards as I have) to get the right thickness for your clay, there are lots of instruction books that have projects with specific thicknesses, I just rolled this to a few cards deep. I then took my eyeglass cleaner lip (i didn't have the nifty cutters I have now at the time) and cut out a circle with it, using it like a cookie cutter.

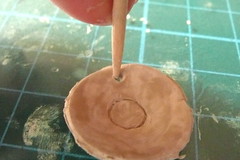
This formed the round shape for my saucer. I then took a cocktail stick and marked a ring in the middle and made a hole for the jump ring to go through, while I was doing this I had to keep moistening the clay, and it did crack a little around the edges, but I am going for an antiqued effect with these, they have survived the mad tea party, so I didn't mind too much.

I then placed a pen in the center circle and started to lift the edges with a shaping tool and give it some depth. After this I left the saucer to dry overnight and moved onto the cup.
The cup was made in much the same way, I rolled out a circle, except for this i had previously molded some polymer clay into a dome shape to put the clay around to make it curved inside, After I had shaped it around the polymer clay i then rolled two sausage shapes and using some water to make it adhere well I put one on the bottom in a loop for the base and I made one into a handle.

These were left overnight until they were completely dried out, it is very important that you don't try to fire them when they are still damp because it simply wont work!

Part II, preparing for firing will be up later :D


(Edit: I am posting parts 2, 3 & 4 at intervals throughout the day with an hour or so in between so that you can read them in order without going down 4 posts and reading up the page!)

Friday, 7 May 2010

To shop or not to shop?

So,
Remember my sewing projects I have made a few times and given away/kept my mitts on?
I am thinking of making more in some really nice quality fabrics I have seen and selling them, I want them to be quite innovative in their design, so I am asking everyone who knits, or who knows someone who knits, what do you want from a project bag? Shape, features, straps? I have had a couple of suggestions that I am adding to my own ideas already and I am really liking the possibilities, I don't want these to just be plain box bags I want them to really cover all the bases I can.
I am also looking at stash bags (hopefully that would be expandable) and needle rolls and notions cases, and toying with the idea of bags to keep your yarn in, in your stash bag to stay organised.
So, please please if you could let me know what your preferences would be so I an build up some research that would be great! And spread the word tell everyone, just leave a comment or send me a message.

Watch this space :D

Sunday, 11 April 2010

Discovering Alchemy


A nice silver ring, made by me, from silver clay.
More to come soon!


Sunday, 14 March 2010

So swiftly...


Ok, so I have about 5 different posts I need to post, all nicely typed up and awaiting uploading, and I know I really should do things in the order that I actually made them but I really cannot wait to show you this one because I am SO PROUD of myself for making this!

I spent Friday night and most of Saturday sawing drilling and sanding and produced this amazing contraption:

I made myself a yarn swift!!
It only cost me about £7!! How amazing is that!
I was never one for manual labour and never really tried very hard in woodwork classes at school but I have always been someone who can do something if they think about it, and so, I did an internet search and found these instructions on how to make your own swift.
I did version one, and I love it, my only problem so far was finding a hex bolt the right size, so the one I got has a rounded end instead of a flat hex end (this is also the reason my base is slightly different from the one in the tutorial, I had to get creative with some spare dowel to make it still balanced and yet raised up enough to accommodate the lack of flat ended bolt)

I have yet to use it to actually wind anything, but I have put a few skeins of yarn on it just to give it a spin :D

Monday, 28 September 2009

My yarn is sprouting toadstools!!

Where be the fairies?!
Do you like my pins? Don't they look great stuck in the yarn to dry! I am so chuffed with them, they are definitely worth the time it took to make them, and the glue and paint fingers. I have only done half the tin of pins so far and there are loads of them so I am not sure if I will do the others. My dad said I should sell them in little sets of 20 or something, they are really cute but I am not sure anyone would buy them, and I haven't a clue what I would charge consider the effort that has gone into them.
Also, there are two without dots on yet, can you spot them?
Other then pricking myself many times with pins I have started the yellow yarn project, which will now simply be called Haven, as I am actually using the real pattern now I have managed to commandeer the book (queen of the book buying I got 10% off because it was creased muhahaha) and a very pretty book it is too.
Here it is:


Along with the pretty yarns I got during my trip to John Lewis. I went purely for Rowan yarn and that is what I got. I was tempted by some Debbie Bliss but no Rowan and only Rowan. I got some Kidsilk Aura to make the 'Calm' pattern from the book, it requires 6 balls, but I can't afford that all in one go so I thought I would get two and get another every so often to make it drag out a bit, I have never understood the hype about dye lots, I guess I am just not fussy about those sorts of things.
I also got Cherry Glace for some lovely Little Cotton Rabbits cupcakes I am knitting up to be a new pin cushion (the ice cream cone one wasn't successful, note to self, cotton wool is not a good padding) and also some Alpaca Cotton for making the bunny on some bunny egg cosies also from the same marvelous woman. If you haven't read Little Cotton Rabbits before you really should, it is one of the few blogs I was reading before I actually started knitting and helped inspire me to actually start. Her animal creations are the most adorable things I have ever seen, I desperately want a fox so I shall have to see if one appears in her Etsy shop next time she releases some of the animals to new homes :)
It is also Julie that put me onto my Swallow casein needles, she has quite a few pairs and they are fab, so i definitely recommend popping over to her blog for a read about her family and crafting and gardening, and if your a knitter you should definitely get her patterns!

I think that is all for the next couple of days. I am working on a sewing project too at the moment but I broke my sewing machine making it on saturday and still haven't gotten round to borrowing my mum's machine yet so more on that when it is complete!