Friday, 29 November 2013
Book review: The Night Rainbow ★★★
The Night Rainbow by Claire King is the story of Pea, a five year old girl who knows far too much about the hardships of life for such a young age. As she and four year old little sister Margot explore the French countryside surrounding their mother's home Pea inadvertently tells us about her knowledge of babies who don't come back from the hospital, her Papa who died and how difficult it is for her Maman to be pregnant again. Pea looks after herself and Margot without anyone stepping in or caring until she comes across Claude, a local man who takes the time to care for Pea and help provide for her.
I struggled a little with this book, not because it was badly written or because it lacked anything, but because it has an awful synopsis. Maybe it is just my penchant for reading crime thriller novels, but upon reading the original synopsis (which you can find here if you want to have a look) I was very wary of the character Claude, so imagine my surprise when there turned out to be no need to be as wary as I had been. As a result I spent most of the book waiting for some big bad event to occur that simply did not, I anticipated more grief for the already heavily grief ridden Maman, it completely altered the way I perceived this novel. It became less about a little girls depiction of her strength and more the less than idyllic life before it got worse. For me this was definitely a case of bad publishing.
If I were to read this again, or to read it without reading the original synopsis, I really do think I would enjoy it immensely, the perspective is that of a five year old, and I believe King has written this very well. It is very difficult to emulate an age that we are not, but Pea doesn't know too much or too little, and as is often the case with her age group she is incredibly observant.
Pea's view of the world is often lighthearted and upbeat despite her struggles to keep herself and Margot clean and healthy. Her descriptions of the location are marvellous, often making me wish I could still appreciate a tree or a meadow in the same way. Occasionally I found Pea difficult to read purely because as an adult we do not have the same patience for the small things in the same way that a small child does, and so I occasionally wished that more focus had been placed on snippets that were glossed over, and vice versa.
The story lacks a bit of drive, it is more of a float along read where you are taking in the scenery rather than one that drives you to keep turning the pages, but it is enjoyable to read despite its frustrations. The characters are charming and the world idyllic, and you are left feeling like your heart is softened in some way. I recommend this book, but please take no notice of the synopsis and simply enjoy the story as it comes to you.
★★★
Labels:
★★★
,
Book Review
,
Reading
Wednesday, 27 November 2013
Christmas at Doddington Hall
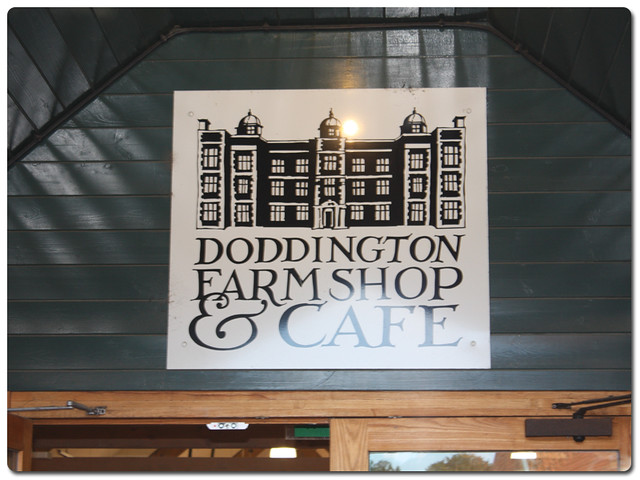
A couple of weeks ago my mother and I popped along to Doddington Hall, the stately home just outside Lincoln to visit their christmas craft fair. We have been told to visit the hall so many times by friends as they know we would enjoy it, but we had never ventured further than the farm shop. The Christmas craft fair was the perfect excuse to spend a few hours there admiring the wares of the stall holders and visiting Doddington's own shops.
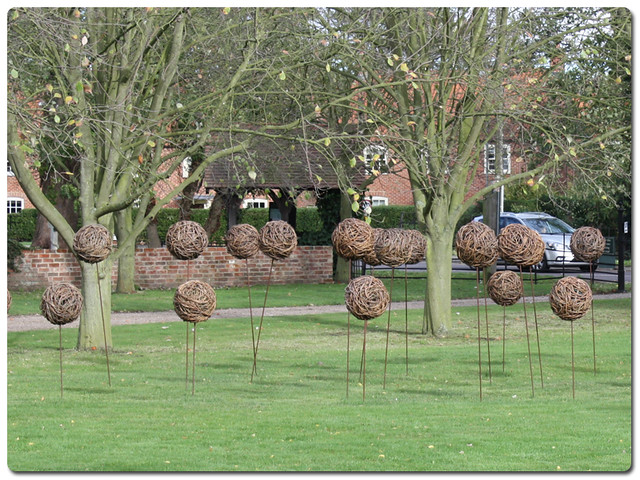
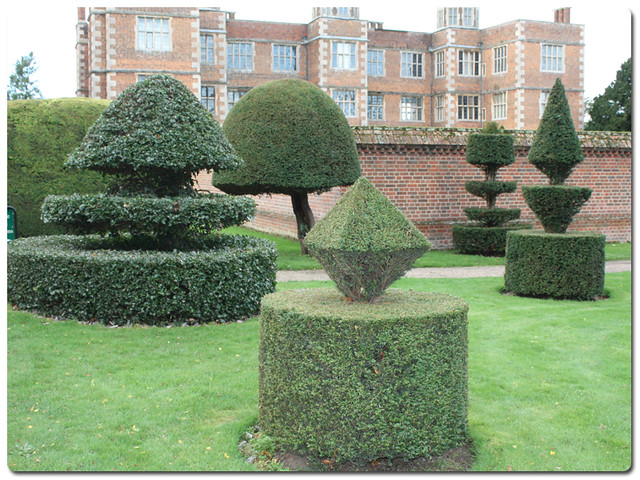
The house itself is a family residence so isn't always open to visitors but the grounds we did take a peek at were beautiful. These garden sculptures made me chuckle, but they are very in keeping with the aesthetic of the Hall which seems to be homemade country estate wares, with local produce and good quality homewares and clothing.
The stall holders were selling some beautiful items.
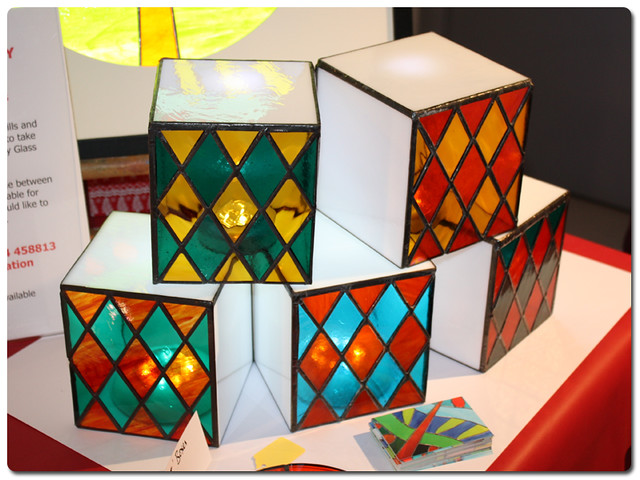
Strawberry Glass Stained Glass pieces and workshops
Cute felt tree decorations and bits and bobs from Heart Felt & Homely
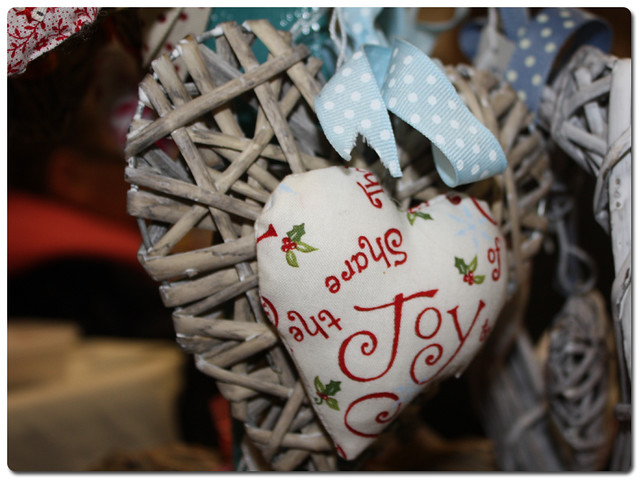
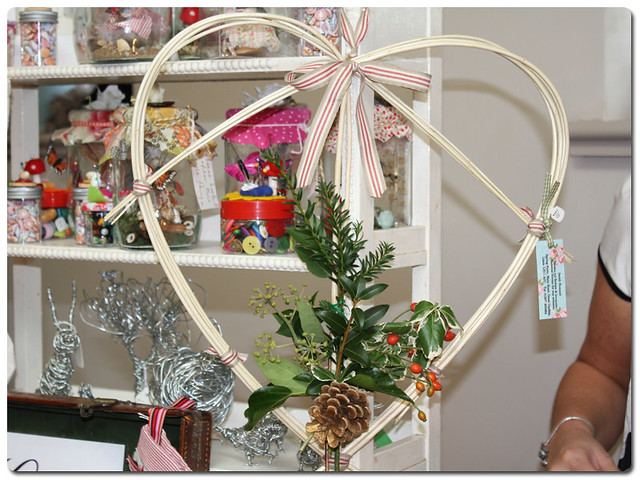
These willow heart wreaths by Sarah Hommel were so pretty and customisable, I wish she had a website, but I have her card for if we decide to get one this year.
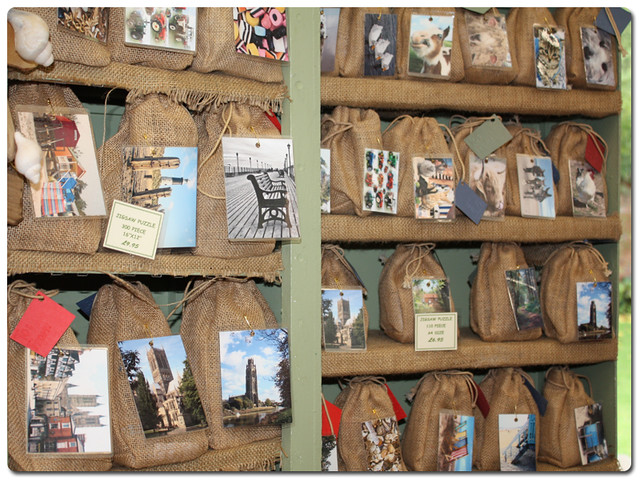
I thought these Jig-Sak's were a great idea, especially for christmas presents for grandparents and we may have to place an order.
Buttercup Lane personalised all manner of little signs there and then for you, both christmas themed and not.
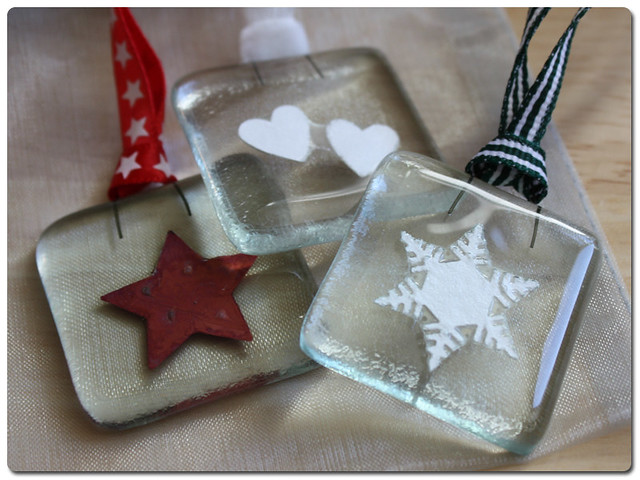
These beautiful tree decorations are made from fused glass, Donna Evans had these along with other fused glass items for sale, including some lovely jewellery.
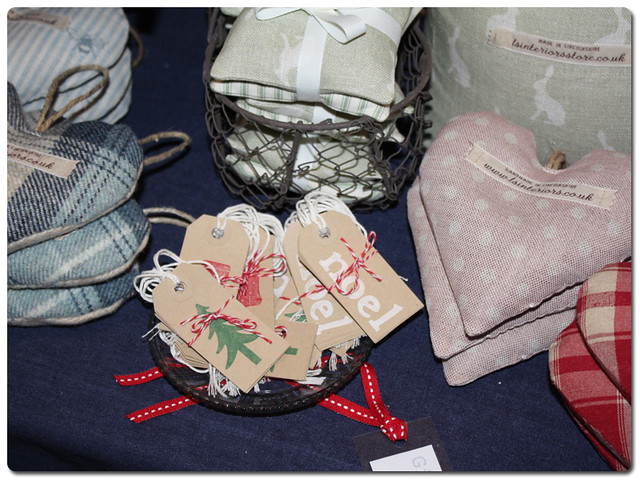
L & S Interiors had some very nice fabric items, I was particularly taken with the door stops but until we have a house with doors to stop I refrained from buying one and instead admired the little items.
After browsing the items available we picked up a few for ourselves. I went for tree decorations mainly, because I love quirky ones and these were all so lovely, but I also picked up some hand stamped present tags too. My mum also had a "Santa stop here" sign personalised for my cousins, it is so cute and I think personalised presents are always a little bit special.
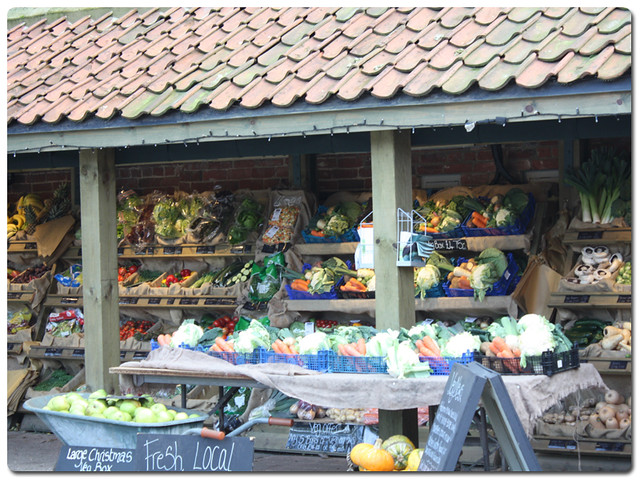
After making our purchases we wandered into Doddington's own stores. Our first stop is nearly always the Farm Shop!
After admiring the lovely grub and picking up some speciality items (local drinks, biscuits and a few bits of veg) we popped into the famous Bauble Barn, which unfortunately was far too crowded to start snapping pictures. This is basically a grotto filled with a wonderful array of christmas decorations at a range of prices, I was really very tempted by some Gisela Graham ones but was restrained as we don't yet have a big tree to be filling with decorations.
Finally we stopped in at the India Jane interiors store and the Doddington country clothing store. India Jane was full of lovely items, though all quite expensive, and again I felt not really the sort of place I could pull out my camera, but there were some really beautiful pieces that would add an elegant touch to any home. The next time we need to buy picture frames we know where to go! They had some lovely ones which would make perfect gift items.
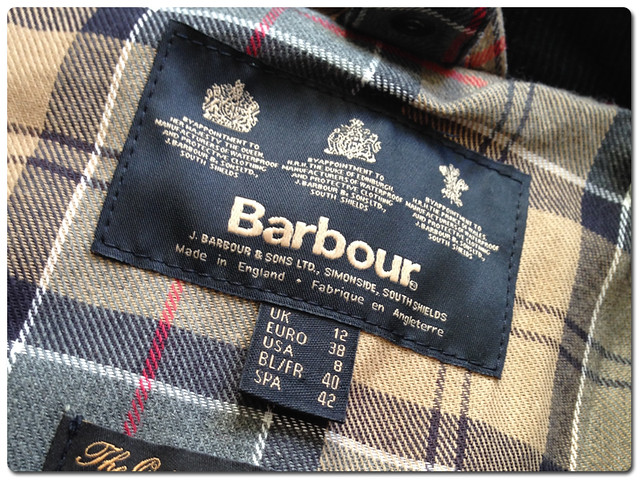
The country clothing store stocks a range of brands, Musto, Barbour and the like, and I may just have purchased something I have had my eye on for a while.
Oops!
Sunday, 24 November 2013
Sunday: Origins Face Masks
Ok, it's fess up time! As much as I love skincare and have battled with keeping my skin nice, I am shockingly bad at keeping a routine. I can manage with the day to day routine, that I don't forget, but ask me to do an extra step once or twice a week and it goes straight out of my mind.
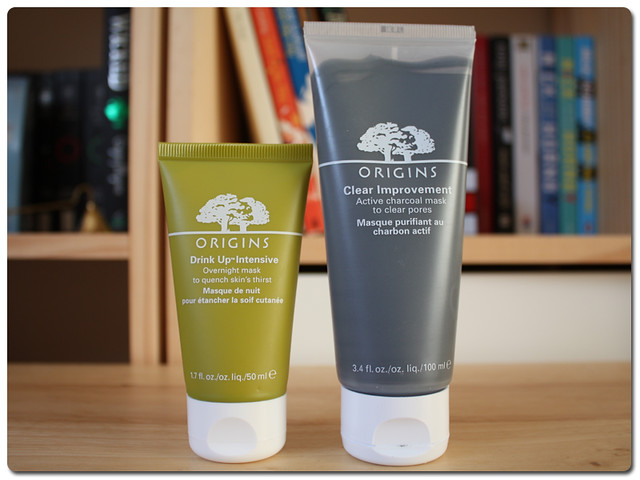
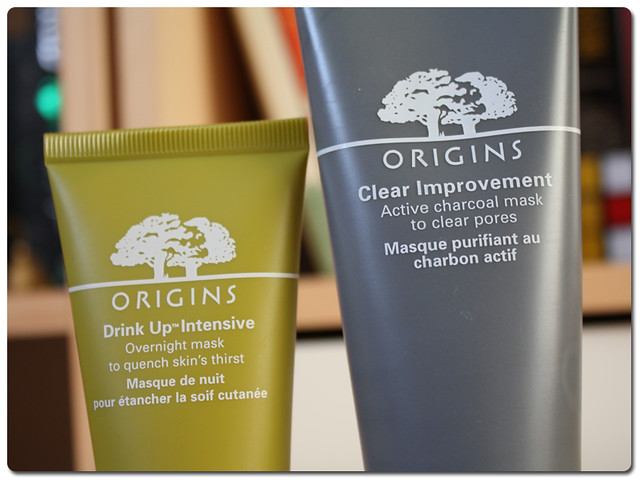
I have been making big improvements to this lately though since I picked up these two lovelies. Origins Clear Improvement Active Charcoal mask and the Drink Up Intensive Overnight mask are my only masks of use at the moment. I picked them up after seeing so many rave reviews about them on YouTube and the like, but I have to admit I was pretty darn sceptical. Masks just never seem to have a wow factor for me, they don't make a huge difference any more than a chemical exfoliator does when it comes to getting the gunk out of my face so I find it hard to get excited about them, but these ones have a lasting effect.
The Clear Improvement mask pretty much does what it says on the tube, it is designed to suck as much rubbish out of your pores as possible by using activated charcoal, china clay and lechetin. I have used a fair few clay masks as these were pretty much where my mask exploits stopped previous to this combination, but this one I like best of them all. It is a light product, it doesn't feel like my face is caked when I have it on, and although it dries out before removal it doesn't make my face feel like I have just used something highly abrasive, you know the feeling, tight and dry.
The Drink Up Intensive mask is the one I was really sceptical of, so much so I only picked up the small travel sized tube but I will be purchasing the standard size as soon as this is empty. I had used a moisturising mask a grand total of once before I picked this up, oily skin and the words "moisturising mask" always had me running for the hills, but since my new hydrating routines seem to be working to quell the tides on my t-zone I thought I would give it a go.
The mask uses avocado oil and apricot kernel oil to replace lost moisture, and Japanese seaweed is in there to help repair that barrier I was talking about in my last skincare post. Let me just say that this mask smells delicious, every time I go to use it I want to eat it, apricots smell damn good! I was really paranoid about how it would feel to just leave this on my face as it is a bit thicker than a moisturiser even though it is a gel, but honestly it doesn't take too long to sink in so that skin is just slightly tacky and is in no way uncomfortable, and if you want you can wipe off any excess (though my skin is clearly so thirsty it wants more!)
This isn't going to be absolutely raving about these, because as I say, I just don't see huge improvements in the short term with using these things (I know Glam Glow has had a lot of hype lately for doing just that) but these two have been making a difference in the longer term.
On sunday nights I steam my face while I shower, double cleanse with my Emma Hardie balm and a flannel, and then apply the Clear Improvement mask. I let it sit while I watch the first part of Downton (God knows which show I am going to have to substitute this with now) and then wash it off. I find my skin to be quite clear and fairly decongested after doing this, but doubling up my masks has been a bit of a revelation to me.
When I thought about using different masks I would naturally think they had to be used on different days, but since seeing Anna's post about layering up your masks I have been slathering the Drink Up Intensive mask on afterwards and it always means I have really glowy and soft skin come monday morning, and who doesn't want a perk like that to brighten up a monday? The effects usually last until mid week before my skin starts to get a little congested again but it is no where near as bad as it was before this combination, and over the past few weeks I have noticed it becoming less and less of a problem. Using the moisturising mask also means my skin stays looking bright for the whole week, which is a massive improvement from my normal dull complexion!
I have been managing to do this every week for a while now so I know it is the method for me, it slots in easily to a spot where I am relaxing anyway and it doesn't take much effort to do, definitely the way forward.
Now I just need to venture into that third step, and after spotting a Ren discount code on Kate's blog, I think I might just invest in the Radiance Renewal Mask to slot in between these two Origins wonders. If I can keep this up one day a week I think I shall be set!
What are your sunday routines?
Friday, 22 November 2013
Book Review: Kiss Me First ★★★
Leila is a bit of a loner, no not a bit, a lot of a loner. She has spent her teens looking after her sick mother, and upon her mother's death at the hands of a cruel disease she withdraws into herself, occupying a small flat and only finding social interaction on internet gaming and forum sites. She comes across Red Pill, a website where intelligent people enter into philosophical debate and she quickly becomes popular, Red Pill becomes her everything so imagine her pride at being asked to undertake a special task that only she can do by the website's founder Adrian. The task isn't a what, but a who, "Tess", Leila is asked to learn to be Tess online, and to take over all of her social media conversations so that Tess's family and friends will be none the wiser when Tess chooses to "check out" of her life. As Leila begins to take control of Tess's imaginary life she slips further and further away from any semblance of her own, and her ability to separate the two is challenged when Leila begins to fall for a character from Tess's past.
Kiss Me First by Lottie Moggach is a book that surprised me. When I was asked to review it after reading the synopsis I expected a bit of a thriller, and instead found myself reading a character story that had me questioning our social media driven lives. The thing that surprised me most was how much I pitied Leila, I expected to feel slightly horrified by her actions, I went into this story fully expecting to have issues with all the characters and the plot and just generally wishing it had been more than it was, but found myself intrigued by the potential for this story to become reality. It is slightly worrying to think that someone may not realise that you are no longer alive purely because of your online interactions, but it is entirely plausible.
Now I am not saying I have no issues with the characters, because I do (as always). I really didn't like Leila, she was incredibly judgemental for a person who has little life experience. She is one of those infuriating characters that you love to loathe, her attitude is such that for the first couple of chapters I believed that Leila was a teen, only to discover she was in her early twenties. I spent a good portion of the book wanting to shout at her and tell her to get over herself and into the real world, but also feeling quite sorry for her lack of life experience. This was even more infuriating when Connor, an old flame of Tess's, arrives on the digital scene and Leila starts to abandon Tess's character and inject some of her own into the conversation.
I love the contrast between Leila and Tess and the problems that the differences caused. During the character assessment phase of the story I spent a lot of my reading time thinking that the plan would never work because they were so different, I really wasn't sure that Leila could truly act so out of character when required, but I think her lack of real character herself may have contributed to her ability to do so. I found Leila to be incredibly stunted and her closeted range of life experience is what I mean by lack of character, she was almost like a watercolour, washed out, as opposed to Tess's brightly hued oil painting.
The plot was intriguing, we were told about the preparation stages before 'check out day', and then Leila taking control of Tess's life which all seemed very controlled, but around two thirds of the way through the novel we really start to see some action as things begin to go wrong. The first two thirds felt a bit long I have to admit, but they lull you into a false sense of security that is quite effective as you think that the plan may actually continue to be successful. One of my only real niggles with the plot was that the author glossed over things that Leila couldn't attribute real life experiences to, it really bugged me throughout, this isn't really an issue but I felt they could have been developed a bit more than Leila simply looking things up on Google. We all know you can't find everything on there and that sources are often far from accurate, it would have been nice to see this have a negative outcome at some point.
I enjoyed the resolution to the story, at one point I was wondering if the author was going to simply have the plan work perfectly, but as expected it does have to come to a close. I enjoyed that it doesn't do so in the manner we, or Leila, expects it to though. To have the character almost choose her own demise is quite satisfying to read, though I found Connor as a device quite frustrating as it seemed to peter out to nothing.
The story is told in two interweaving parts, we have Leila in the present day telling us about how she has come to be in a commune in Spain, and then the actual telling of the past where we discover about project "Tess". I have to admit that this is what kept me reading the whole way through, I wanted to know why Leila was at the commune for the majority of the story, and then I wanted to find out what she would discover there. I am not sure that the ending really satisfied my hunger for this information as I would have preferred the story to be tied up neatly, but a mystery was better suited for the plot, and the suggestion about Facebook really made me smile as I hadn't seen it coming.
This book has been very difficult to rate and review, I feel a bit mean giving this only three stars but to give it more would suggest that it was better than it was. The novel really is the sort of book that some people will love and others really not be able to get on with, if you are of an open mind I think you may find it interesting, if not enjoyable, but those grossly opposed to the idea of assisting someone to commit suicide may fail to appreciate the delicate aspects of the story. There is definitely potential in this debut author and I look forward for reading more of her work!
★★★
Kiss Me First is available from The Book Depository
Labels:
★★★
,
Book Review
,
Reading
Wednesday, 20 November 2013
Added to my Bookshelf
Oops, adding to my TBR again when it is already way beyond what it should be.
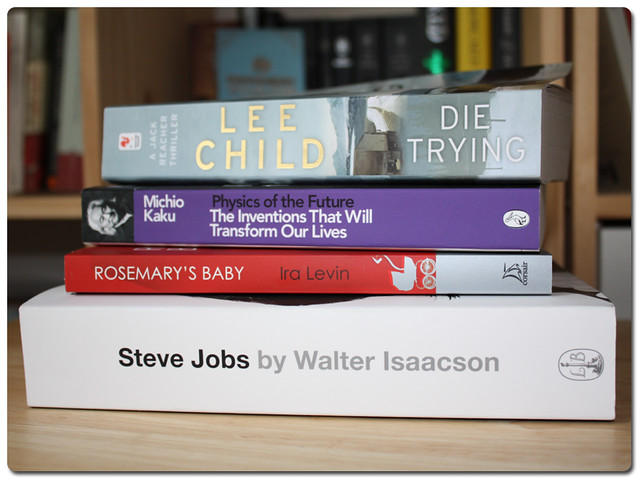
A nice mix of fiction and non fiction this time.
1. Die Trying by Lee Child - I loved Killing Floor, so grabbed the next one for when i really just want to read a good American crime adventure story.
2. Physics of the Future by Michio Kaku - I love the idea of this book, not sure if it will actually live up to my expectations, but I love books about inventions, so potential future inventions should also be cool to read about.
3. Rosemary's Baby by Ira Levin - Got this to read for halloween and then didn't get around to it, a classic horror story I believe, though I have never seen the film.
4. Steve Jobs by Walter Isaacson - I borrowed this from the library but it was so huge and i didn't have time to read it that I took it back and bought a copy so that I can have it waiting for the perfect time. Paperback is a bit more reading friendly too!
What have you added to your bookshelves lately?
Monday, 18 November 2013
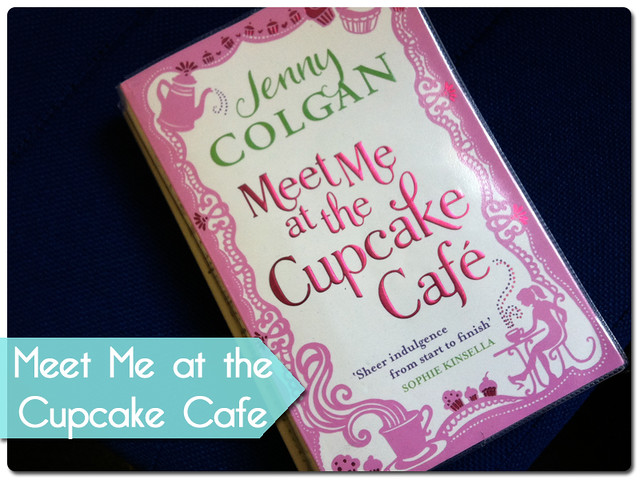
Book Review: Meet Me at the Cupcake Cafe ★★★
Baking is in Issy Randall's blood, since she was a little girl her grandpa has taught her the ways of being a master baker. In Meet Me at the Cupcake Cafe by Jenny Colgan we discover how after redundancy from her mundane city job strikes, Issy decides to take a risk and set up her own bakery as The Cupcake Cafe. But running a fledgeling business is no easy task, and it takes all of Issy and her friends determination to keep it going.
Issy's story is the story that makes you wish you could have her opportunity, that a set of bad circumstances like losing your job could result in the perfect job owning a cupcake cafe. It really is the stuff of dreams and something many of us will never experience, either through lack of skill, determination, or desire. It is the stuff that is perfect for a chick lit-ty book because it makes you feel warm and fuzzy inside and you can vicariously experience someone else's achievement without taking the risk yourself.
I personally have a bit of an extra love for this book purely for that vicarious living reason. I am a cupcake baker, I love to bake them in all different flavours and often get called upon by friends and family for special occasions, but there is no way on earth I could do it for a living. I know that I personally would lose the passion for the baking once I absolutely had to do it in order to live, so to read about someone who takes the plunge and makes it work, even if it is fictional, was so satisfying for me.
It was both this feeling, and Issy's funny mishaps, that kept me reading through the seemingly slow beginning of the book until the actual formation of the bakery occurs. It was once the boring job had been left behind (and we met the cute banker, books always pick up once you meet the love interest!) that this book began to come into its own, we met creative characters which each added a delightful personality to the story, and the setting instantly became more magical.
Although it took me a while to get into this book, I ended up really enjoying it. The characters were loveable and the plot fluffy and fun. The recipes throughout added a cute touch and I was really tempted to try some of them out purely because the characters were enjoying them so much.
I will definitely continue with this series of Colgan's recipe-romances, they remind me a bit of a Sophie Kinsella story, light, sweet and fluffy just like a good cupcake.
Meet Me at the Cupcake Cafe is currently £5.59 at The Book Depository
★★★
Labels:
★★★
,
Book Review
,
Reading
Friday, 15 November 2013
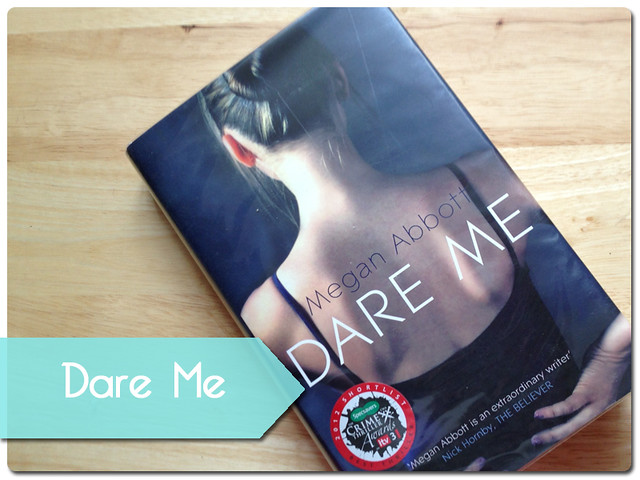
Book Review: Dare Me ★★★★
I was initially drawn to this book after seeing it mentioned on the ChapterStackss YouTube channel, she mentioned it as being recommended by Gillian Flynn, and although I have yet to get around to reading one of her books (so many books, no where near enough time!) I have a pretty good feeling that I will enjoy them as they fall into the psychological thriller category. Megan Abbott's Dare Me falls into the same category but with a twist, it is an adult crime novel that revolves around the lives of a group of cheerleaders. That alone had me hooked!
Dare Me is voiced by Addy, the second cheerleader in the squad, the best friend of the Queen Bee Beth, when Beth says jump, Addy tells the girls to hop to it and joins in too. They rule their school. When a new young and personable coach comes along in the form of Colette French and spoils the Queen's fun, Addy gets caught in the crossfire. As teenage obsession goes to new lengths and a crime is committed, the inner workings of a teenage girls mind reveals that being a minor in no way means that you shouldn't be a suspect.
I think it was ultimately the reveal about how cheerleaders are still gritty, and quite nasty teenagers underneath all the perky ponytails and wide grins that drew me in, I was hoping to see a novel which isn't all about teen angst but instead touching upon adult topics, and that was exactly what Dare Me is. It was almost like Mean Girls crossed with Law and Order (On Wednesdays we wear pink, dun dun) The importance for sometimes trivial things to teenagers was beautifully demonstrated throughout the novel, the interplay between a petty squabble and then a seemingly quite dark and venomous revenge plot was refreshing in its contrast. The girls were at one point squabbling over a bracelet when there had been a very suspicious and serious death only hours before. It had the mind and the emotions reeling as a reader.
For me this story also demonstrated how dangerous a teenager can be, and how society does not immediately jump to the conclusion that they could be anything more than an innocent bystander unless they have been shown to have personal issues. With the raft of school massacres that have occurred in the states over the years, you would think that teenagers would come under suspicion in the same way that an adult would if they were found to be linked to a crime, but in Dare Me, Abbott highlighted the reality that authorities can sometimes find it difficult to see past the pep to the turmoil within. What I found truly refreshing about this though was that the other teenagers could see the potential danger, and were truly afraid of it. Having been a teenager not so long ago myself, I can honestly say that I too would worry about some teens and their good intentions, and I could identify with the turmoil of Addy's situation.
Dare Me is a great read if you are looking for something to lead you from the typical teen drama into an adult crime novel, or if you are into being slightly freaked out by the possibilities when it comes to your psychological thrillers, either way, Dare Me will make you consider teenagers a little differently!
★★★★
Dare Me is currently £5.59 from the Book Depository
Labels:
★★★★
,
Book Review
,
Reading
Wednesday, 13 November 2013
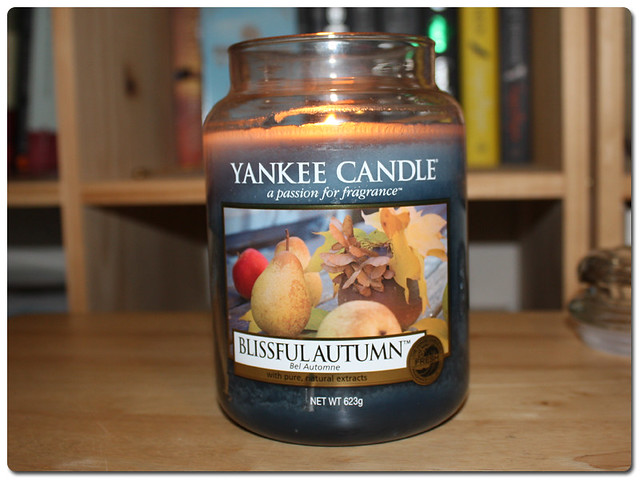
Yankee Candle Blissful Autumn
Although it has been autumn feeling for a month or so here in my little part of the world, and there have been the right colours on the trees and conkers to crunch under your shoes, there has been a lack of a chill wind to really make it feel like a British autumn until the past week or so.
We had those crazy gale force winds and all of a sudden those nice golden leaves were on the ground, and I couldn't resist instagraming this picture on my walk back to my car after work.
And all of a sudden this week it has been cold! Now I have to admit I usually feel the cold long before anyone else, but when my boyfriend says it is actually cold, you know the summer has definitely gone for the year.
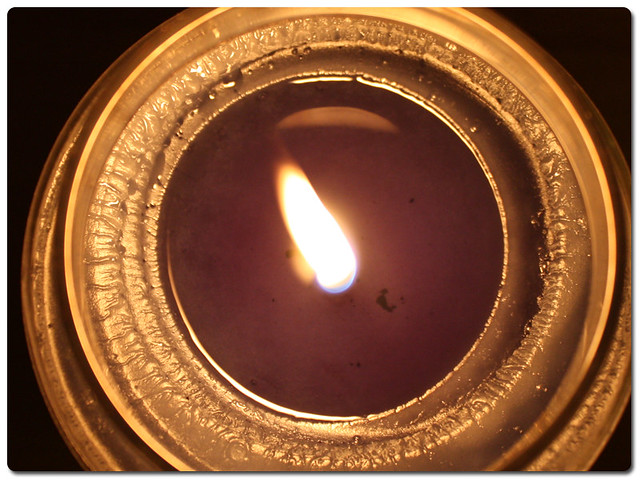
To keep myself feeling seasonal I have been burning this Yankee Candle in my room. Blissful Autumn is pretty much exactly what it says on the label. As soon as I take off the lid I can smell autumn ripe fruit and crisp cool winds along with the woody scent of fallen leaves.
As with all Yankee Candles the scent is quite strong and lingers for a long time, but this scent isn't cloying like some of the truly sweet ones, so it doesn't overpower you (it even passed the headache test). I only need to burn this for a short while and the scent lingers for hours which for me feels much more cost effective than buying a cheaper candle. I also always like to pick up the large jars as they get significantly longer burn times, they may be expensive, but they last forever!
I love candles, and this one is perfect for the time of year, it is peaceful, seasonally fresh and crisp, and makes me feel all toasty and warm.
Monday, 11 November 2013
Behold the Homemade #Cronut!
I have been lusting after Cronuts ever since Rosie wrote about them on her blog. They sounded like the perfect light donut and knowing I wasn't going to be hopping over to New York any time soon I decided I would just have to make them myself!
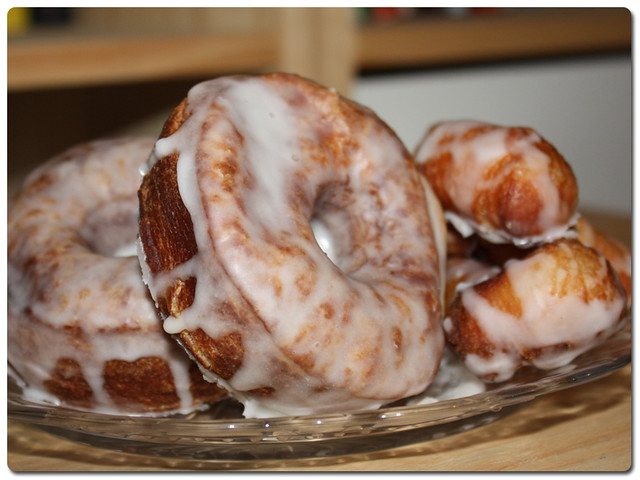
I read through quite a few recipes, and settled upon this one and adapted it for British readers. This is a time intensive exercise so I made sure I had a whole day free to make these (and I actually managed to make a batch of cinnamon rolls in between making these, post to come soon).
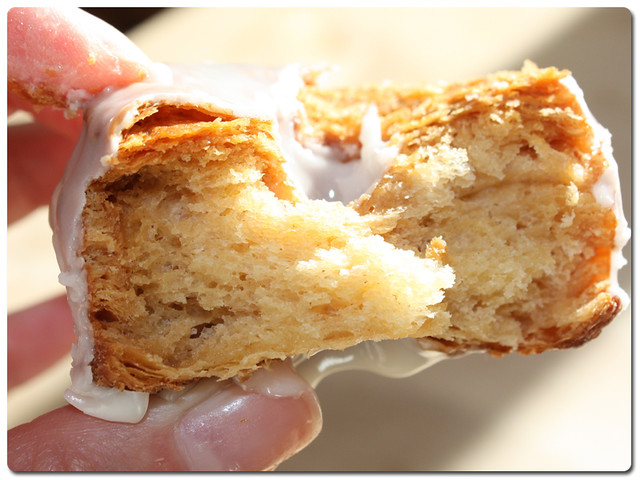
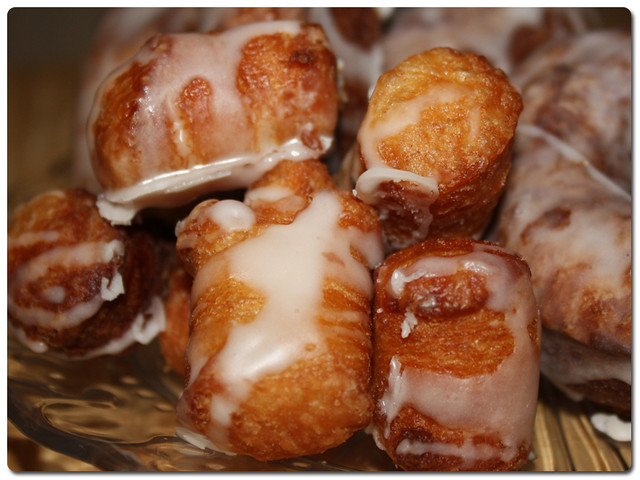
They aren't perfect so I have made a change to the method, but I am pretty impressed. I had never made flaky puff pastry before, I have always cheated and got it ready done. It was hard work but they were tasty and everyone seemed to enjoy them. My tip, don't throw away the scraps, those made for the best morsels of the bunch!
So, how did I make them you ask?!
First you need to get yourself some ingredients, you Brits will notice the recipe is in US Cups, well I just so happen to have some that my sister brought back from San Diego for me, so I did some weighing as I measured everything out
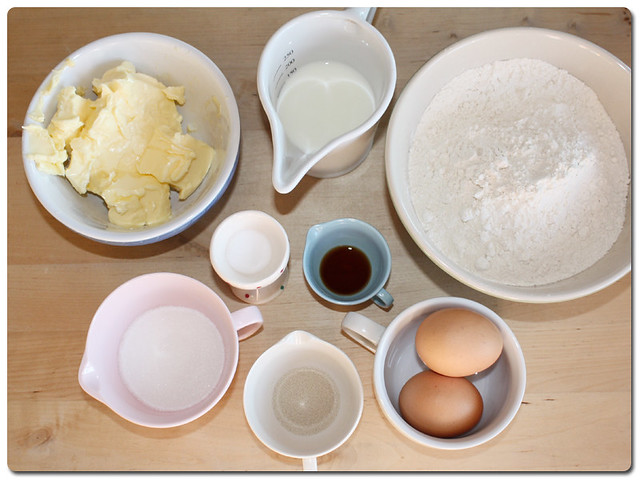
You will need:
3/4 cups (150ml) milk, warmed
1 tablespoon active dry yeast (One 7g Sachet)
1/3 cup (70g) sugar
2 large eggs
1 teaspoon vanilla
3 1/2 cups (460g) all-purpose (Plain) flour
1 teaspoon salt
1 cup (225g) unsalted butter, at room temperature
Here's how to turn them into cronut-ty deliciousness!
Start by mixing together your warmed milk and yeast in a large bowl.
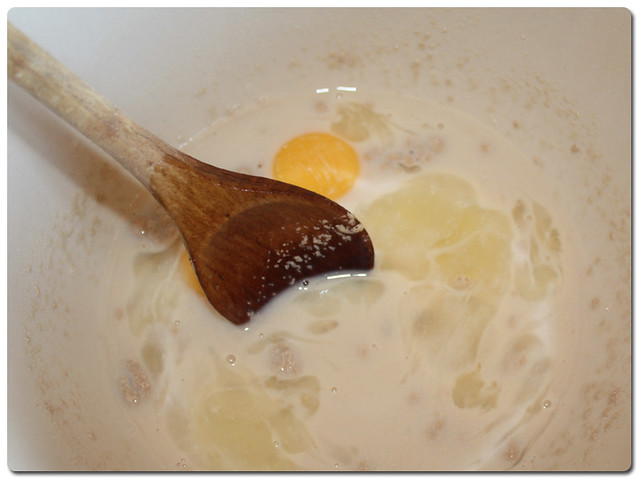
Crack in your eggs, add the sugar and vanilla and give it another good stir. Make sure you break up the egg yolks when you are stirring, the mix is quite wet at this point so you may need to make a special effort to do this.
It will look pretty murky as below, but just give it chance.
Separate quarter of a cup (45g) of your flour out from the rest and set aside, you will need this later so don't forget!
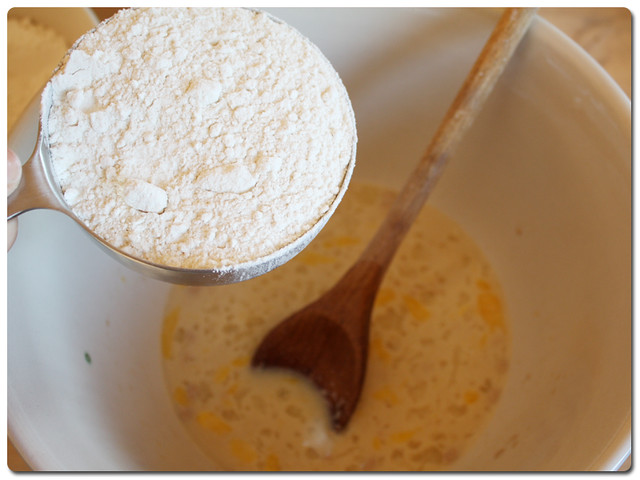
Add one cup (170g) of the remaining flour and your salt to the wet mix and stir in.
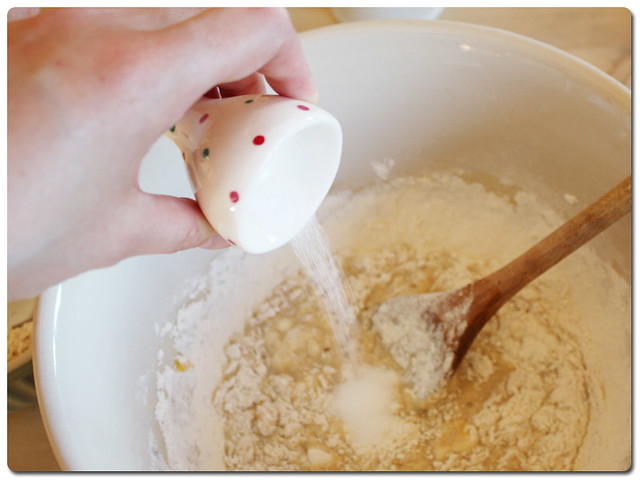
Your mix will slowly turn into more of a batter.
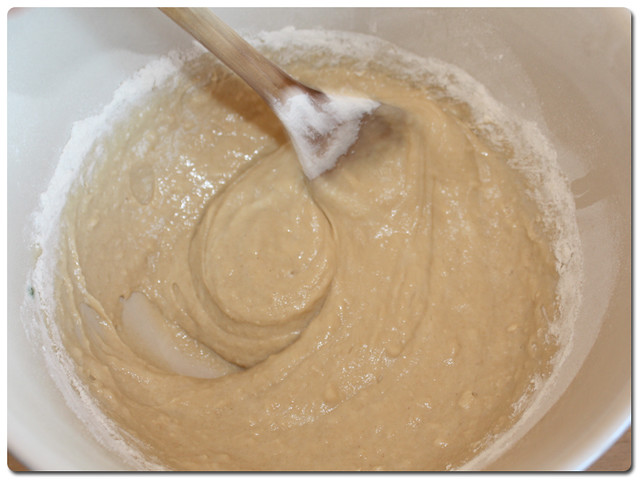
Slowly add the rest of the remaining flour (not the quarter cup reserved) while mixing until your mixture becomes more doughy in consistency.
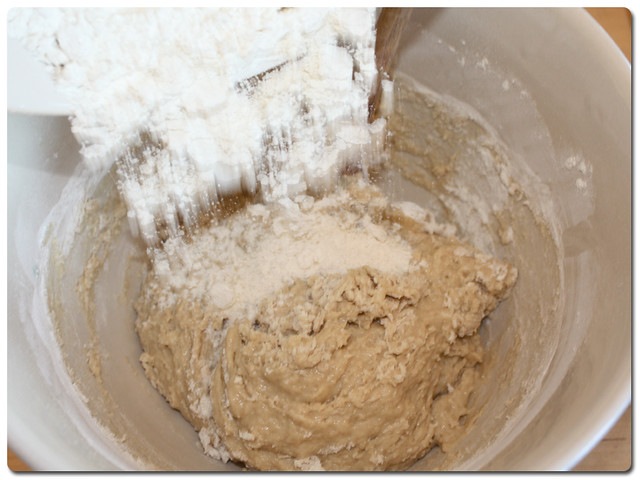
Now it is time to get your hands dirty, use your fingers to help the dough bind together until you can easily remove it from the bowl to start kneading.
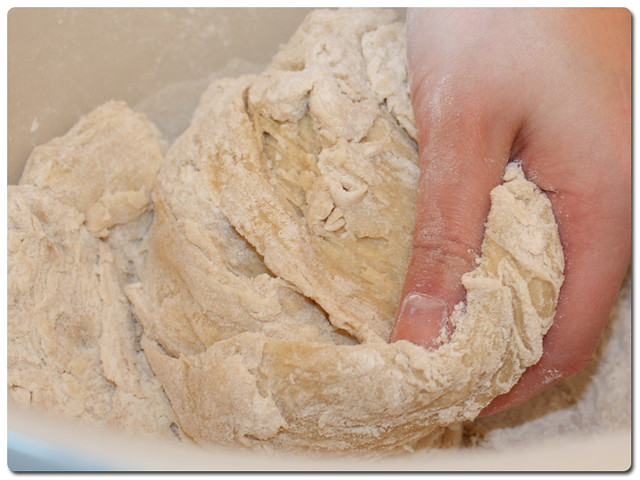
Knead the dough until it smooth yet elastic. It should have a bit of grip to it still, don't add too much flour while kneading, we don't want it to dry out.
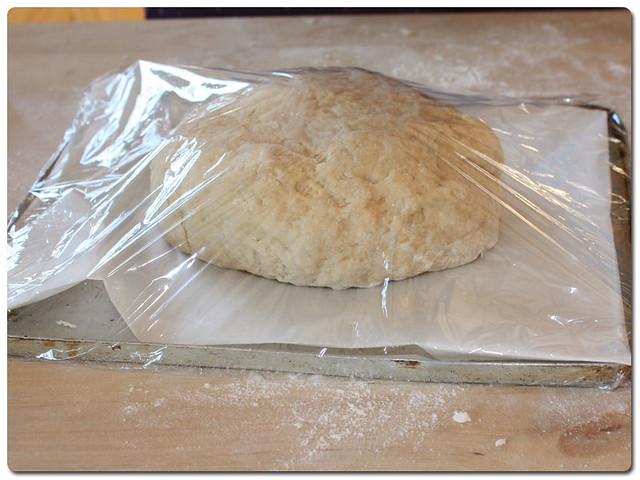
Once it has been well kneaded, place it on a baking tray covered in greaseproof and cover with cling film. Let it rest in the fridge for half an hour.
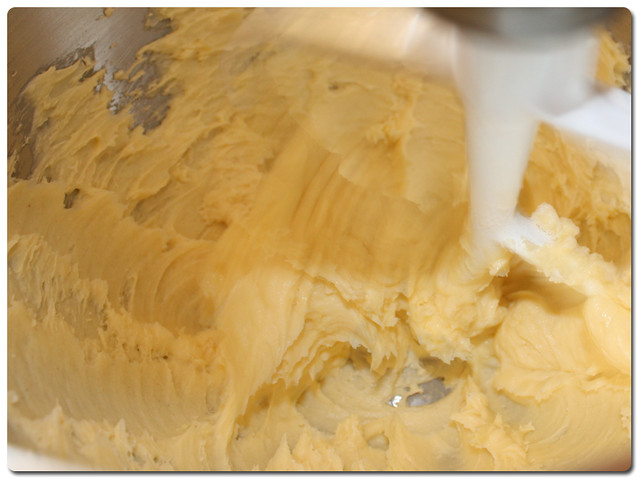
While the dough is cooling, take your butter and the reserved quarter cup (45g) of flour and put them in an electric mixer. You could do this by hand but only if you are prepared to use some elbow grease as these babies need beating together!
They need to end up light and fluffy like this
After the half an hour is up, take the dough from the fridge and place it onto a very lightly floured surface, you then need to roll into a rectangle. The original recipe stated that it should be about 13 by 18 inches and 1/4-inch thick, but I will be completely honest and admit I just rolled it to as near a rectangle as I could get, chilled dough is not easy to roll!
Once it is rolled out you need to spread the butter over the entire surface, making sure you right up to the edge. once this is done, you need to start the first of the folds.
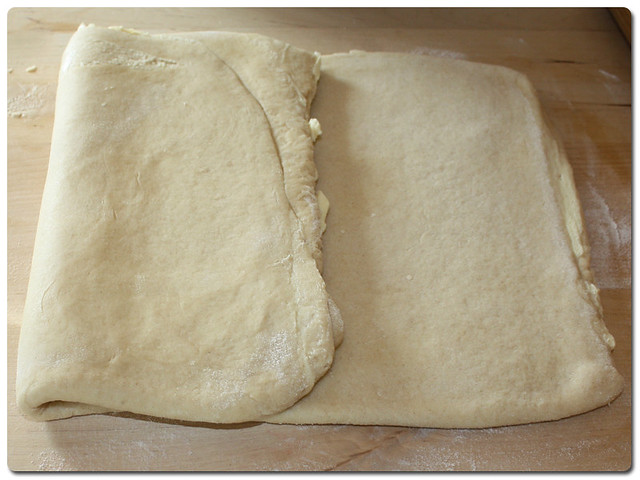
I forgot to take pictures the first time so these are technically of the second fold, but here is how you do it. Fold one short side of the dough over one third of the dough until it slightly over the middle.
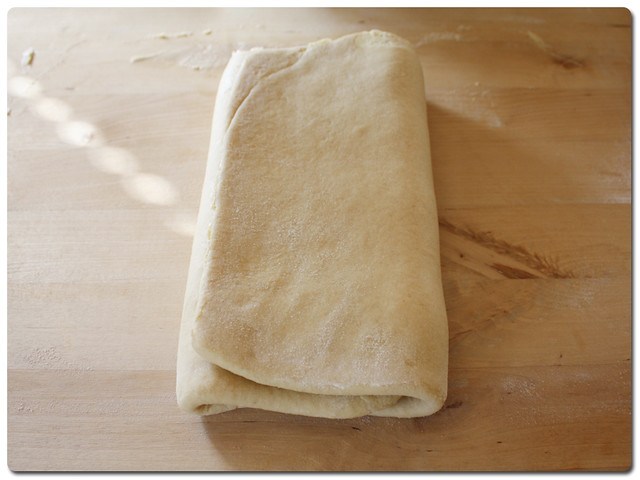
Then fold the second short side over that one, like you would a sheet of paper to go in a letter envelope.
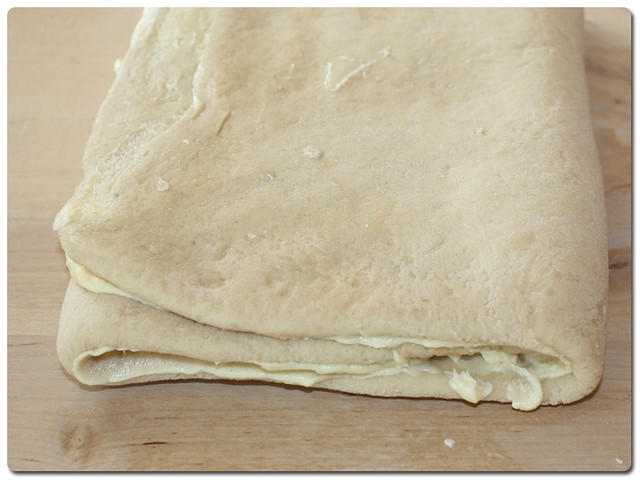
Here is a close up of how the end should look after the first turn, good and buttery, but most importantly, the ends meet perfectly!
Place the dough back on the tray and cover, and then let rest in the fridge again for another half an hour.
You then need to take it back out of the fridge and roll it out once again, making sure that the buttery ends are to the left and right of you, so effectively a 90 degree turn from how it ended up after the previous fold.
Refer back to the folding pictures above if you are unsure, but complete the same process of folding one and then the second third of the dough into the centre. This completes the second turn and the dough should again be left to rest in the fridge for 30 minutes. Make a note of the turns as you go (i kept a tally on a scrap of paper)
Repeat the turning process two more times, making sure you roll with the open ends from the previous turn to the left and right of you, and that you give the dough enough time to rest in between each turn. Once you have made four turns in total, leave the dough to rest for at least an hour in the fridge. I left mine overnight.
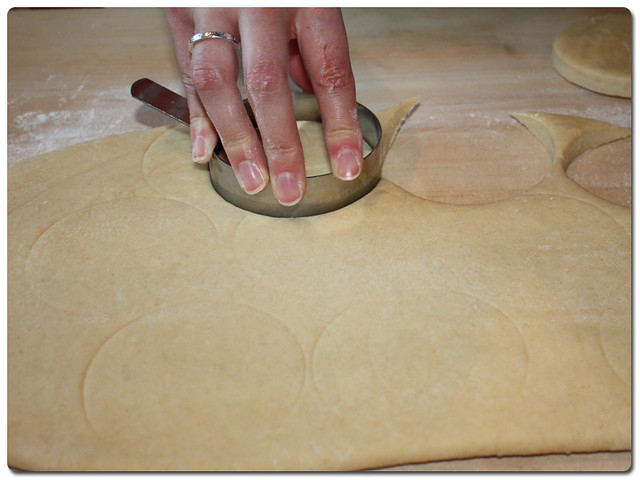
Once you are ready to start cooking the Cronuts, you need to remove your dough from the fridge and roll out to about 1 inch thick. Grab a cutter of some description (this is an egg frying ring) and start cutting out your shapes, I actually ended up using a bottle screw cap for the middles as I didn't have a cutter small enough.
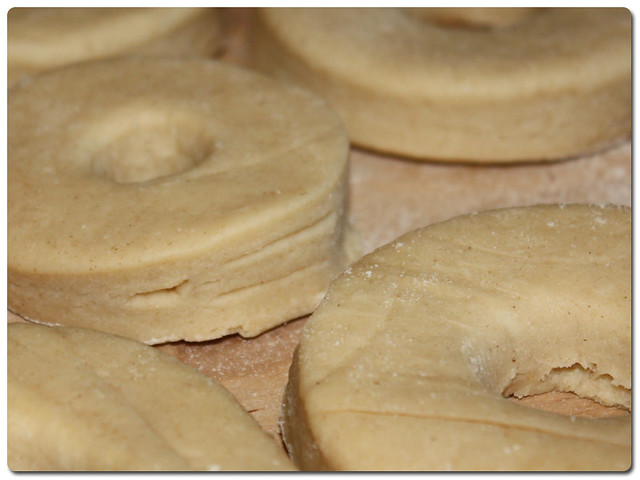
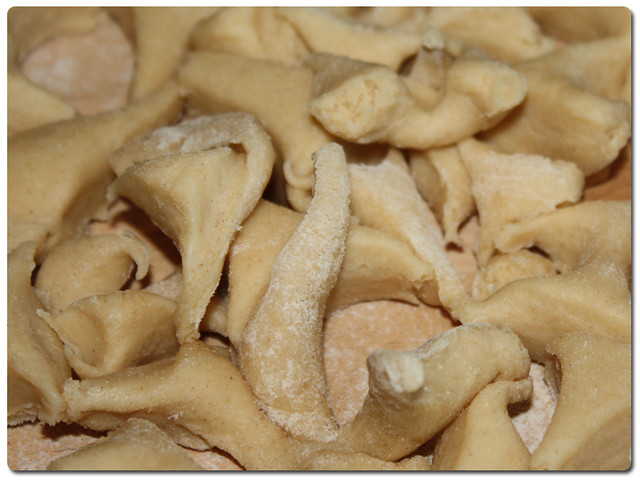
Don't forget those scraps! Make sure you keep all the middles and cut the scraps into manageable pieces so that you can fry those too.
Get yourself a pan that you can deep fry in (I used a wok) and fill it by a couple of inches, we need the oil to be deep enough that the cornets can float.
Now the original recipe says to heat the oil to 350 degrees Fahrenheit, but I discovered the hard way that is far too hot! I ended up almost burning the outside of some of my cronuts and having to bake them to cook the middles, so I am going to say the best way to gauge the temperature is to cook some of those scraps. Grab a big piece and pop it in, the oil should bubble around it, and when it is golden take it out and break it open. if the inside is all flaky and perfect then the oil is hot enough.
When you are ready, start to place your cronuts very carefully in the oil, be careful so that it doesn't spit back at you and burn.
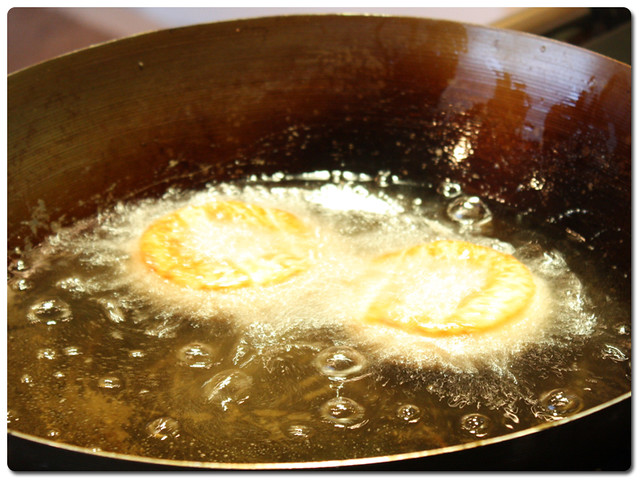
Let them sizzle away, the most I put in the pan at once was two as the more you put in the pan the lower the temperature becomes.
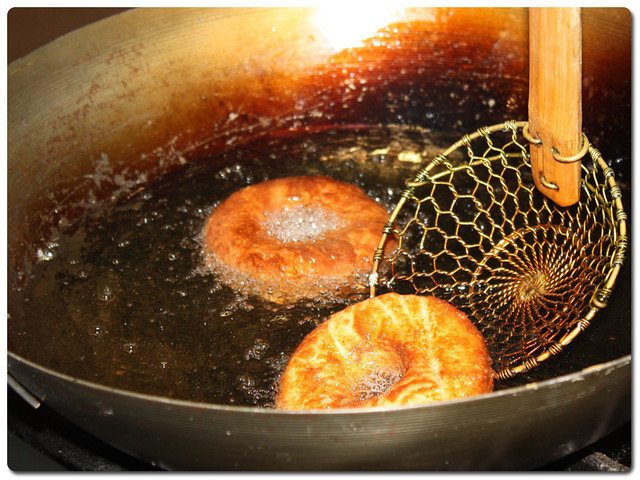
Once they are golden on one side, flip them over, and continue to flip if you think they need a little longer to make sure you don't burn one side. When they look all puffy and crisp and a deep golden brown fish them out with a straining spoon and let them drain onto a piece of kitchen towel.
Once they are all cooked, you can either glaze them warm or let them cool a little so that the glaze sets. I made the maple glaze in the recipe for mine, but you could go wild here with all sorts of flavourings just like they do at the Dominique Ansel Bakery
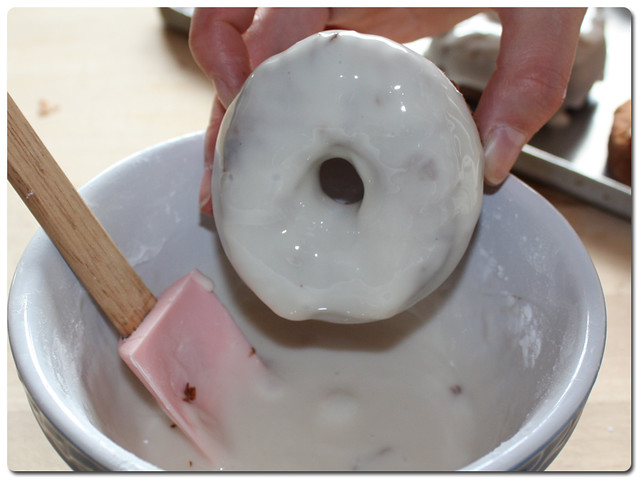
Now I find recipes for a glaze a bit redundant as they never seem to be right if you use the supposedly correct measures, so I basically mixed a couple of tablespoons of maple syrup with icing sugar and a bit of milk in a bowl, adding little bits of each until I thought I had a relatively thick glaze which should set.
Then I started simply dunking them in and letting them drip onto the tray!
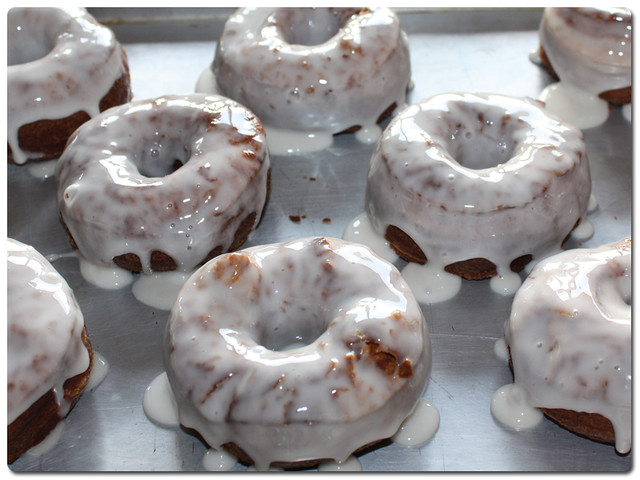
They look pretty good don't they?
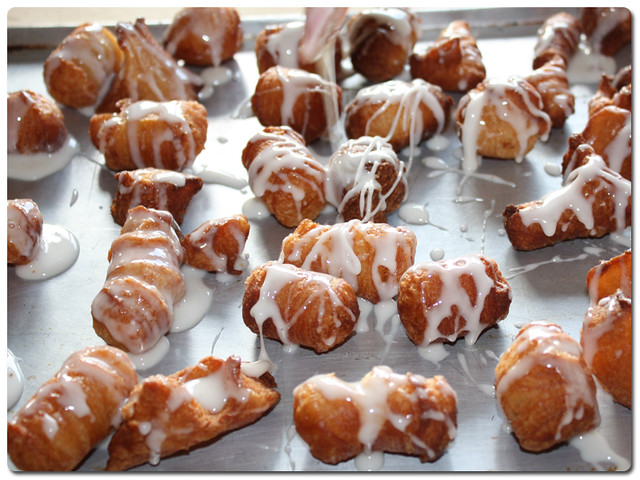
I drizzled the left over glaze over the scraps so that they didn't get all lonely too.
After waiting what felt like an age, I took some round to a friends and we all tucked in!
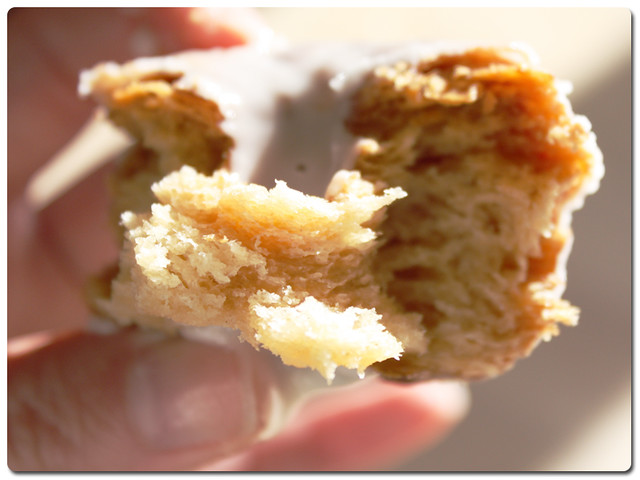
Check out the flake on those bad boys!
They were very very good. Really good. So much so I have already been asked when I can whip up some more!
So, a bit time intensive, but oh so worth it. Yum.
Will you be giving them a try?
I read through quite a few recipes, and settled upon this one and adapted it for British readers. This is a time intensive exercise so I made sure I had a whole day free to make these (and I actually managed to make a batch of cinnamon rolls in between making these, post to come soon).
They aren't perfect so I have made a change to the method, but I am pretty impressed. I had never made flaky puff pastry before, I have always cheated and got it ready done. It was hard work but they were tasty and everyone seemed to enjoy them. My tip, don't throw away the scraps, those made for the best morsels of the bunch!
So, how did I make them you ask?!
First you need to get yourself some ingredients, you Brits will notice the recipe is in US Cups, well I just so happen to have some that my sister brought back from San Diego for me, so I did some weighing as I measured everything out
You will need:
3/4 cups (150ml) milk, warmed
1 tablespoon active dry yeast (One 7g Sachet)
1/3 cup (70g) sugar
2 large eggs
1 teaspoon vanilla
3 1/2 cups (460g) all-purpose (Plain) flour
1 teaspoon salt
1 cup (225g) unsalted butter, at room temperature
Here's how to turn them into cronut-ty deliciousness!
Start by mixing together your warmed milk and yeast in a large bowl.
Crack in your eggs, add the sugar and vanilla and give it another good stir. Make sure you break up the egg yolks when you are stirring, the mix is quite wet at this point so you may need to make a special effort to do this.
It will look pretty murky as below, but just give it chance.
Separate quarter of a cup (45g) of your flour out from the rest and set aside, you will need this later so don't forget!
Add one cup (170g) of the remaining flour and your salt to the wet mix and stir in.
Your mix will slowly turn into more of a batter.
Slowly add the rest of the remaining flour (not the quarter cup reserved) while mixing until your mixture becomes more doughy in consistency.
Now it is time to get your hands dirty, use your fingers to help the dough bind together until you can easily remove it from the bowl to start kneading.
Knead the dough until it smooth yet elastic. It should have a bit of grip to it still, don't add too much flour while kneading, we don't want it to dry out.
Once it has been well kneaded, place it on a baking tray covered in greaseproof and cover with cling film. Let it rest in the fridge for half an hour.
While the dough is cooling, take your butter and the reserved quarter cup (45g) of flour and put them in an electric mixer. You could do this by hand but only if you are prepared to use some elbow grease as these babies need beating together!
They need to end up light and fluffy like this
After the half an hour is up, take the dough from the fridge and place it onto a very lightly floured surface, you then need to roll into a rectangle. The original recipe stated that it should be about 13 by 18 inches and 1/4-inch thick, but I will be completely honest and admit I just rolled it to as near a rectangle as I could get, chilled dough is not easy to roll!
Once it is rolled out you need to spread the butter over the entire surface, making sure you right up to the edge. once this is done, you need to start the first of the folds.
I forgot to take pictures the first time so these are technically of the second fold, but here is how you do it. Fold one short side of the dough over one third of the dough until it slightly over the middle.
Then fold the second short side over that one, like you would a sheet of paper to go in a letter envelope.
Here is a close up of how the end should look after the first turn, good and buttery, but most importantly, the ends meet perfectly!
Place the dough back on the tray and cover, and then let rest in the fridge again for another half an hour.
You then need to take it back out of the fridge and roll it out once again, making sure that the buttery ends are to the left and right of you, so effectively a 90 degree turn from how it ended up after the previous fold.
Refer back to the folding pictures above if you are unsure, but complete the same process of folding one and then the second third of the dough into the centre. This completes the second turn and the dough should again be left to rest in the fridge for 30 minutes. Make a note of the turns as you go (i kept a tally on a scrap of paper)
Repeat the turning process two more times, making sure you roll with the open ends from the previous turn to the left and right of you, and that you give the dough enough time to rest in between each turn. Once you have made four turns in total, leave the dough to rest for at least an hour in the fridge. I left mine overnight.
Once you are ready to start cooking the Cronuts, you need to remove your dough from the fridge and roll out to about 1 inch thick. Grab a cutter of some description (this is an egg frying ring) and start cutting out your shapes, I actually ended up using a bottle screw cap for the middles as I didn't have a cutter small enough.
Don't forget those scraps! Make sure you keep all the middles and cut the scraps into manageable pieces so that you can fry those too.
Get yourself a pan that you can deep fry in (I used a wok) and fill it by a couple of inches, we need the oil to be deep enough that the cornets can float.
Now the original recipe says to heat the oil to 350 degrees Fahrenheit, but I discovered the hard way that is far too hot! I ended up almost burning the outside of some of my cronuts and having to bake them to cook the middles, so I am going to say the best way to gauge the temperature is to cook some of those scraps. Grab a big piece and pop it in, the oil should bubble around it, and when it is golden take it out and break it open. if the inside is all flaky and perfect then the oil is hot enough.
When you are ready, start to place your cronuts very carefully in the oil, be careful so that it doesn't spit back at you and burn.
Let them sizzle away, the most I put in the pan at once was two as the more you put in the pan the lower the temperature becomes.
Once they are golden on one side, flip them over, and continue to flip if you think they need a little longer to make sure you don't burn one side. When they look all puffy and crisp and a deep golden brown fish them out with a straining spoon and let them drain onto a piece of kitchen towel.
Once they are all cooked, you can either glaze them warm or let them cool a little so that the glaze sets. I made the maple glaze in the recipe for mine, but you could go wild here with all sorts of flavourings just like they do at the Dominique Ansel Bakery
Now I find recipes for a glaze a bit redundant as they never seem to be right if you use the supposedly correct measures, so I basically mixed a couple of tablespoons of maple syrup with icing sugar and a bit of milk in a bowl, adding little bits of each until I thought I had a relatively thick glaze which should set.
Then I started simply dunking them in and letting them drip onto the tray!
They look pretty good don't they?
I drizzled the left over glaze over the scraps so that they didn't get all lonely too.
After waiting what felt like an age, I took some round to a friends and we all tucked in!
Check out the flake on those bad boys!
They were very very good. Really good. So much so I have already been asked when I can whip up some more!
So, a bit time intensive, but oh so worth it. Yum.
Will you be giving them a try?
Subscribe to:
Posts
(
Atom
)