Image Map

Saturday, 15 May 2010

Tea? Part III


Now for the fun bit, firing. This may be fun but it is also dangerous and Is definitely only for people who have had their shot of caffeine!
First I placed my fire grille on the hob (this came in the set I mentioned in Part I) and turned up the heat. You have to wait for it to glow orange before you can begin, and you need to remember where the orange bits were because these are the hottest areas and you are then going to turn off the hob and place your clay items on the hottest parts of the grille using tweezers and turn the heat back on.

This picture is larger because in my opinion it is the coolest part of the process. After the clay has been heating for a few seconds the binder will burn off in an actual visible flame, much like when you flambe something you are cooking, only on a smaller scale. Obviously I wouldn't recommend standing over the item at this stage or you may lose your eyebrows!

After this stage the silver is starting to fuse together, and so you have to wait until there is a slight orange glow to the items, as you can kind of see below (this is really difficult to photograph by the way!)

After they are glowing orange you need to keep the heat going for a few minutes to make sure they are properly fired through. You then need to turn off the heat and leave them to cool for around 20 minutes. After tis time you can move them and place them in cold water to completely cool them off. When they are fired they should be a bit smaller and will be covered in a white residue like this:

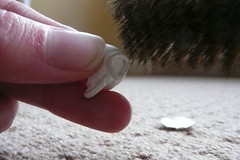
if you clink them together you can also obviously hear that they are now metal. Now comes the final parts, using a wire brush (I am using a soft brass brush here because I find stainless steel ones are too harsh) you need to brush away all the white residue until the items are a dull silver colour. Then using a silver burnisher you should rub all over the item to make them shine.
The Final post will be the unveiling :D

Tea? Part II


Onwards!

Now the first stage when the clay is dry was to remove the polymer clay from the cup. I used a needle tool to do this because it is nice and sharp. You do need to be very careful when doing this however, gently remove parts of clay at a time, because the silver clay although dry is still fragile and can be crushed easily.

Once that was done I then used the needle tool to pick out any bits of clay that were stuck in the grooves of the clay, this is fiddly but sanding does not always get it all so it is a good idea.


After this I had to file the teeth marks into the side of the cup, I used a round miniature file for this and simply filed marks next to each other but increased the depth of the hole on the center ones, this took a bit of work and made a lot of dust so be careful and put a cloth down.
Also again this stage requires you to be gentle as too much pressure will break the cup.


After I filed the teeth marks I also filed the edges of the top of the cup to smooth them down and make them even. I then used a superfine sanding pad to smooth all over, I attempted to remove as much of the uneven texture inside the cup as possible. It is important when doing this to try and keep the sanding stokes going in the same direction as some of the pattern will show through after firing.

After working on the cup I simply sanded the edges of the saucer and made sure there wasn't any excess around the jump ring hole and I was good to go for the next step, Part III: Firing!


Tea? Part I


'Take some more tea,' the March Hare said to Alice, very earnestly.
'I've had nothing yet,' Alice replied in an offended tone, 'so I can't take more.'
'You mean you can't take LESS,' said the Hatter: 'it's very easy to take MORE than nothing.'
- 'Alice's Adventures in Wonderland', Lewis Carroll

That above is one of my favorite quotes, from one of my favorite scenes in all literature. There is something about the ridiculousness of the Hatter and the Hare that appeals to me, it must be my silly side making itself known, and it is the fact that the ridiculousness is in fact very true.

Now because I love the mad tea party so much, for my second silver clay project I decided a tea cup and saucer would be perfect. It is also something which is very me (I have a thing about afternoon tea, for my 16th birthday I wanted a full tea service, nothing else, just a pretty antique tea service, I finally got one when I turned 18) and so is something which I can relate to in a number of ways and any items I would make regarding it would have multiple references for myself. To make the set more 'Mad' however I also decided to bring in the 'eat me, drink me' thing, so there is a bite out of the cup, cool yes?

Now on to the pictures! (Note: My camera died while I was doing this and the clay dried quickly so some images are of the saucer and some are of the cup)

First up, the tools required for using silver clay, now not all of these are necessary for every project, but a lot of them are essentials, in this picture we have craft knives, clay shapers, files, rollers, sanding pads, pliers, burnishers, and wire brushes among a couple of other bits and bobs. I got the basics in a set which was around £30 which I ordered from here, but a lot of other stuff I simply got from my local craft shop and other online retailers, such as basic jewelry findings and jump rings and pliers and things. I am going to be making another ring in the near future and for that you would require a couple of extra things and I will show you those when the time comes.


Now, the actual clay. I use Art Clay Silver 650 in the Slow dry version. The slow dry part is very important because I am not very good at managing to quickly do what I want to do to manipulate the clay and so this significantly extends the working time I have. I also have to keep the clay moist with a water pen while I am working. The clay comes in packets like this:

These are 7g packets, and when you open it you may think that there isn't much clay for what you pay (around £8/9) but I made my first ring with less than 7g so it goes a long way. You can buy in 7g, 10g, 20g, and 50g weights and prices are a little over £1 a gram, which I believe is reasonable.

Now on to the making. I have missed a stage in the pictures here because it came out blurry, but the first stage is to grease your hands and tools with vaseline and then roll put the amount of clay you want to use, now you can use special spacers or playing cards (or naughty fairy cards as I have) to get the right thickness for your clay, there are lots of instruction books that have projects with specific thicknesses, I just rolled this to a few cards deep. I then took my eyeglass cleaner lip (i didn't have the nifty cutters I have now at the time) and cut out a circle with it, using it like a cookie cutter.

This formed the round shape for my saucer. I then took a cocktail stick and marked a ring in the middle and made a hole for the jump ring to go through, while I was doing this I had to keep moistening the clay, and it did crack a little around the edges, but I am going for an antiqued effect with these, they have survived the mad tea party, so I didn't mind too much.

I then placed a pen in the center circle and started to lift the edges with a shaping tool and give it some depth. After this I left the saucer to dry overnight and moved onto the cup.
The cup was made in much the same way, I rolled out a circle, except for this i had previously molded some polymer clay into a dome shape to put the clay around to make it curved inside, After I had shaped it around the polymer clay i then rolled two sausage shapes and using some water to make it adhere well I put one on the bottom in a loop for the base and I made one into a handle.

These were left overnight until they were completely dried out, it is very important that you don't try to fire them when they are still damp because it simply wont work!

Part II, preparing for firing will be up later :D


(Edit: I am posting parts 2, 3 & 4 at intervals throughout the day with an hour or so in between so that you can read them in order without going down 4 posts and reading up the page!)

Friday, 14 May 2010

A brief sewing update

Just a couple of things,

Pretty Fabrics to be sewn into potential items for sale...


(P.S. I am looking into dying and printing my own cotton for some projects)

Cool free gifts with Cath Kidston book "Sew!" which was really easy to put together.


And another Kidston book arrived in the post Wednesday, expect embellishments galore.


Any pretty things gracing you today? Mine are making me feel summery :)

Thursday, 13 May 2010

Beating the system.


Sometimes people in publishing houses do really quite silly things. One of these times occurred last month when Charlaine Harris' new Sookie Stackhouse book had its UK release date changed and not it's US one.

So when life gives you lemons...


You have them shipped from across the pond!


(Edit: I changed the picture once the sun came out, see how pretty and sparkly?!)

I am quite impressed as this only took 10 days to get here, considering the new UK release date is the 10th of June this is much much earlier then if I had waited, and after doing some currency conversions it actually worked out about the same price!
Plus the US get much prettier covers for their books, I am tempted to order some from ebay, this one has glitter on the rose and on Sookie's dress, GLITTER! It sparkles!! Much better then the plain black with red lips the UK is going for.

Sometimes I really do wonder why I haven't just marched into a publishing conference and yelled "Are you all mad?!" due to the lack of common sense some of these people have.

Anyways, so the book is great, the pace has decreased a little but in a good way and this book focuses on getting under the skin of the characters and seeing what really makes them tick. This one is also back to the 'Sookie saves the day' dynamic as opposed to the recent 'Sookie gets beaten up' plot lines.

Best line by far from Pam "F**k a zombie!"

Me likey :D

Friday, 7 May 2010

To shop or not to shop?

So,
Remember my sewing projects I have made a few times and given away/kept my mitts on?
I am thinking of making more in some really nice quality fabrics I have seen and selling them, I want them to be quite innovative in their design, so I am asking everyone who knits, or who knows someone who knits, what do you want from a project bag? Shape, features, straps? I have had a couple of suggestions that I am adding to my own ideas already and I am really liking the possibilities, I don't want these to just be plain box bags I want them to really cover all the bases I can.
I am also looking at stash bags (hopefully that would be expandable) and needle rolls and notions cases, and toying with the idea of bags to keep your yarn in, in your stash bag to stay organised.
So, please please if you could let me know what your preferences would be so I an build up some research that would be great! And spread the word tell everyone, just leave a comment or send me a message.

Watch this space :D

Tuesday, 4 May 2010

Berry Sock Update


So, I am still preparing a silver clay post for you guys, but it is taking me longer then originally anticipated to sort through all the pictures so I have a knitting update. As a teaser though, in my silver clay post I will be showing you how I made myself a tea cup and saucer pendant to symbolise the Mad Hatter's tea party in Alice in Wonderland.

But, until that is done, to the knitting...


Remember these Berry Socks from way back here and then here?
Well, look at them now! One sock finished and the second one I am knitting the heel flap at the moment, I am feeling really rather productive.

What made me pick these back up you ask? Well really I have that Hermione sock to blame, I just couldn't get back on with it so I have set it aside and decided to finish this really simple pair before tacking the more complicated ones with their modified eye of partridge heel.
As you can see there is some colour pooling, and I really wish they were a bit tighter around the leg, but the first one will make a lovely comfy sleep sock so I am not really going to complain!

When I have these finished I will only have the Hermione socks and a second Bella's mitt in pink to complete and then I will start with something new, either a garment or a shawl, both new things for me and so will get my brain going I am hoping. Before then, however, I am hoping to have the second alchemy post up and possibly a little sewing one up about some project bags in a lovely gingham fabric I got from Laura Ashley in the sale. Nice and summery.

I hope you all are well :D

P.S. I celebrated my 22nd birthday on Sunday and treated myself to some hand dyed yarn from Fresh From The Cauldron, more info when they have been dyed and have arrived, which should be early next month!

Sunday, 11 April 2010

Discovering Alchemy


A nice silver ring, made by me, from silver clay.
More to come soon!


Saturday, 10 April 2010

The brightest witch of her age...


I most certainly am not. Hermione, however, must be if she can get this pattern right!


This is my first Hermione's Everyday Sock, which I am knitting out of my Dublin Dye Company Sock yarn.
This sock will be the death of me!
Originally, I had finished this first sock of the pair, only to find out when I had nearly finished it and weighed the amount of yarn left on my new trusty electric scales that I didn't have enough for the second sock, so I have ripped it back to 12 pattern repeats at the ankle, instead of the 18 originally called for, and I am now for some strange reason unable to complete the heel!
I don't know what it is but somehow I just cannot get it to line up properly, so although I love the pattern and it will be a relief to get this yarn used and out of my stash I am going to set it aside for a couple of weeks and try and finish my Berry Socks instead. Hopefully if I come back to it at a later date I will be less frustrated and more open to figuring out what I have done wrong.

So watch this space!

I am also however determined not to cast on any new projects until I have finished one of the 3 I have in progress, and I get itchy fingers quite quickly, so I wouldn't be surprised if it didn't take long for me to have them sorted.

Friday, 9 April 2010

Mmm..


Toasty hands!
That is what this little guy is leaving me with:

This is the cup cuddler that I mentioned I was going to knit in my last post, isn't it cute? It is currently wrapped around a glass jar, and originally I only put it there for taking the photo but I have had a bit of an idea and think that a few of them around jars with little tea lights in them or mini votive candles would make lovely little decorations, especially if I made one with a more lace based pattern.

This one was made from this pattern, with 2 strands of my Katia Merino held together, which I have now completely used up! I do like to destash, and it got me some HPKCHC points too.

I shall have a larger update of the socky variety later today, be warned there will be venting!!